Redux 要点,第 8 部分:RTK 查询高级模式
-
如何使用带有 ID 的标签来管理缓存失效和重新获取
¥How to use tags with IDs to manage cache invalidation and refetching
-
如何在 React 之外使用 RTK 查询缓存
¥How to work with the RTK Query cache outside of React
-
处理响应数据的技术
¥Techniques for manipulating response data
-
实现乐观更新和流式更新
¥Implementing optimistic updates and streaming updates
介绍
¥Introduction
在 第 7 部分:RTK 查询基础知识 中,我们了解了如何设置和使用 RTK 查询 API 来处理应用中的数据获取和缓存。我们向 Redux 存储添加了 "API 切片",定义了 "query" 端点来获取帖子数据,定义了 "mutation" 端点来添加新帖子。
¥In Part 7: RTK Query Basics, we saw how to set up and use the RTK Query API to handle data fetching and caching in our application. We added an "API slice" to our Redux store, defined "query" endpoints to fetch posts data, and a "mutation" endpoint to add a new post.
在本节中,我们将继续迁移示例应用以将 RTK 查询用于其他数据类型,并了解如何使用其一些高级功能来简化代码库并改善用户体验。
¥In this section, we'll continue migrating our example app to use RTK Query for the other data types, and see how to use some of its advanced features to simplify the codebase and improve user experience.
本节中的一些更改并不是绝对必要的 - 包含它们是为了演示 RTK 查询的功能并展示你可以执行的一些操作,以便你可以了解如何在需要时使用这些功能。
¥Some of the changes in this section aren't strictly necessary - they're included to demonstrate RTK Query's features and show some of the things you can do, so you can see how to use these features if you need them.
编辑帖子
¥Editing Posts
我们已经添加了一个突变端点来将新的 Post 条目保存到服务器,并在我们的 <AddPostForm> 中使用它。接下来,我们需要更新 <EditPostForm>,以便编辑现有帖子。
¥We've already added a mutation endpoint to save new Post entries to the server, and used that in our <AddPostForm>. Next, we need to handle updating the <EditPostForm> to let us edit an existing post.
更新编辑帖子表单
¥Updating the Edit Post Form
与添加帖子一样,第一步是在 API 切片中定义新的突变端点。这看起来很像添加帖子的突变,但端点需要在 URL 中包含帖子 ID 并使用 HTTP PATCH 请求来指示它正在更新某些字段。
¥As with adding posts, the first step is to define a new mutation endpoint in our API slice. This will look much like the mutation for adding a post, but the endpoint needs to include the post ID in the URL and use an HTTP PATCH request to indicate that it's updating some of the fields.
export const apiSlice = createApi({
  reducerPath: 'api',
  baseQuery: fetchBaseQuery({ baseUrl: '/fakeApi' }),
  tagTypes: ['Post'],
  endpoints: builder => ({
    getPosts: builder.query<Post[], void>({
      query: () => '/posts',
      providesTags: ['Post']
    }),
    getPost: builder.query<Post, string>({
      query: postId => `/posts/${postId}`
    }),
    addNewPost: builder.mutation<Post, NewPost>({
      query: initialPost => ({
        url: '/posts',
        method: 'POST',
        body: initialPost
      }),
      invalidatesTags: ['Post']
    }),
    editPost: builder.mutation<Post, PostUpdate>({
      query: post => ({
        url: `posts/${post.id}`,
        method: 'PATCH',
        body: post
      })
    })
  })
})

export const {
  useGetPostsQuery,
  useGetPostQuery,
  useAddNewPostMutation,
  useEditPostMutation
} = apiSlice
添加完毕后,我们就可以更新 <EditPostForm>。它需要从存储中读取原始的 Post 条目,使用它来初始化组件状态以编辑字段,然后将更新的更改发送到服务器。目前,我们正在使用 selectPostById 读取 Post 条目,并为请求手动分派 postUpdated thunk。
¥Once that's added, we can update the <EditPostForm>. It needs to read the original Post entry from the store, use that to initialize the component state to edit the fields, and then send the updated changes to the server. Currently, we're reading the Post entry with selectPostById, and manually dispatching a postUpdated thunk for the request.
我们可以使用在 <SinglePostPage> 中使用的相同 useGetPostQuery 钩子从存储中的缓存中读取 Post 条目,并且我们将使用新的 useEditPostMutation 钩子来处理保存更改。如果需要,我们还可以添加加载控件并在更新过程中禁用表单输入。
¥We can use the same useGetPostQuery hook that we used in <SinglePostPage> to read the Post entry from the cache in the store, and we'll use the new useEditPostMutation hook to handle saving the changes. If desired, we can also add a spinner and disable the form inputs while the update is in progress as well.
import React from 'react'
import { useNavigate, useParams } from 'react-router-dom'

import { Spinner } from '@/components/Spinner'

import { useGetPostQuery, useEditPostMutation } from '@/features/api/apiSlice'

// omit form types

export const EditPostForm = () => {
  const { postId } = useParams()
  const navigate = useNavigate()

  const { data: post } = useGetPostQuery(postId!)

  const [updatePost, { isLoading }] = useEditPostMutation()

  if (!post) {
    return (
      <section>
        <h2>Post not found!</h2>
      </section>
    )
  }

  const onSavePostClicked = async (
    e: React.FormEvent<EditPostFormElements>
  ) => {
    // Prevent server submission
    e.preventDefault()

    const { elements } = e.currentTarget
    const title = elements.postTitle.value
    const content = elements.postContent.value

    if (title && content) {
      await updatePost({ id: post.id, title, content })
      navigate(`/posts/${postId}`)
    }
  }

  // omit rendering
}
缓存数据订阅生命周期
¥Cache Data Subscription Lifetimes
让我们尝试一下,看看会发生什么。打开浏览器的 DevTools,转到“网络”选项卡,刷新页面,清除“网络”选项卡,然后登录。当我们获取初始数据时,你应该会看到对 /posts 的 GET 请求。当你单击 "查看帖子" 按钮时,你应该会看到对 /posts/:postId 的第二个请求,该请求返回单个帖子条目。
¥Let's try this out and see what happens. Open up your browser's DevTools, go to the Network tab, refresh the page, clear the network tab, then login. You should see a GET request to /posts as we fetch the initial data. When you click on a "View Post" button, you should see a second request to /posts/:postId that returns that single post entry.
现在单击单个帖子页面内的 "编辑帖子"。UI 切换为显示 <EditPostForm>,但这次单个帖子没有网络请求。为什么不?
¥Now click "Edit Post" inside the single post page. The UI switches over to show <EditPostForm>, but this time there's no network request for the individual post. Why not?

RTK 查询允许多个组件订阅相同的数据,并将确保每个唯一的数据集仅获取一次。在内部,RTK 查询为每个端点 + 缓存键组合保留活动 "subscriptions" 的参考计数器。如果组件 A 调用 useGetPostQuery(42),则会获取该数据。如果组件 B 随后挂载并调用 useGetPostQuery(42),则它会请求相同的数据。我们已经有一个现有的缓存条目,因此不需要请求。两个钩子用法将返回完全相同的结果,包括获取的 data 和加载状态标志。
¥RTK Query allows multiple components to subscribe to the same data, and will ensure that each unique set of data is only fetched once. Internally, RTK Query keeps a reference counter of active "subscriptions" to each endpoint + cache key combination. If Component A calls useGetPostQuery(42), that data will be fetched. If Component B then mounts and also calls useGetPostQuery(42), it's asking for the same data. We already have an existing cache entry, so there's no need for a request. The two hook usages will return the exact same results, including fetched data and loading status flags.
当活动订阅数量降至 0 时,RTK 查询将启动内部计时器。如果在添加任何新的数据订阅之前计时器到期,RTK 查询将自动从缓存中删除该数据,因为应用不再需要该数据。但是,如果在计时器到期之前添加了新的订阅,则计时器将被取消,并且将使用已缓存的数据,而无需重新获取。
¥When the number of active subscriptions goes down to 0, RTK Query starts an internal timer. If the timer expires before any new subscriptions for the data are added, RTK Query will remove that data from the cache automatically, because the app no longer needs the data. However, if a new subscription is added before the timer expires, the timer is canceled, and the already-cached data is used without needing to refetch it.
在这种情况下,我们的 <SinglePostPage> 安装并通过 ID 请求该个人 Post。当我们点击 "编辑帖子" 时,<SinglePostPage> 组件被路由卸载,并且活动订阅也因卸载而被删除。RTK 查询立即启动 "删除此帖子数据" 计时器。但是,<EditPostPage> 组件立即安装并使用相同的缓存键订阅了相同的 Post 数据。因此,RTK Query 取消了计时器并继续使用相同的缓存数据,而不是从服务器获取数据。
¥In this case, our <SinglePostPage> mounted and requested that individual Post by ID. When we clicked on "Edit Post", the <SinglePostPage> component was unmounted by the router, and the active subscription was removed due to unmounting. RTK Query immediately started a "remove this post data" timer. But, the <EditPostPage> component mounted right away and subscribed to the same Post data with the same cache key. So, RTK Query canceled the timer and kept using the same cached data instead of fetching it from the server.
默认情况下,未使用的数据会在 60 秒后从缓存中删除,但这可以在根 API 切片定义中进行配置,也可以使用 keepUnusedDataFor 标志在各个端点定义中进行覆盖,该标志指定缓存生命周期(以秒为单位)。
¥By default, unused data is removed from the cache after 60 seconds, but this can be configured in either the root API slice definition or overridden in the individual endpoint definitions using the keepUnusedDataFor flag, which specifies a cache lifetime in seconds.
使特定项目无效
¥Invalidating Specific Items
我们的 <EditPostForm> 组件现在可以将编辑后的帖子保存到服务器,但我们有一个问题。如果我们在编辑时单击 "保存帖子",它会返回到 <SinglePostPage>,但它仍然显示未经编辑的旧数据。<SinglePostPage> 仍在使用之前获取的缓存 Post 条目。就此而言,如果我们返回主页并查看 <PostsList>,它也会显示旧数据。我们需要一种方法来强制重新获取单个 Post 条目和整个帖子列表。
¥Our <EditPostForm> component can now save the edited post to the server, but we have a problem. If we click "Save Post" while editing, it returns us to the <SinglePostPage>, but it's still showing the old data without the edits. The <SinglePostPage> is still using the cached Post entry that was fetched earlier. For that matter, if we return to the main page and look at the <PostsList>, it's also showing the old data. We need a way to force a refetch of both the individual Post entry, and the entire list of posts.
之前,我们了解了如何使用 "tags" 使部分缓存数据无效。我们声明 getPosts 查询端点提供 'Post' 标记,而 addNewPost 突变端点使相同的 'Post' 标记无效。这样,每次添加新帖子时,我们都会强制 RTK 查询从 getQuery 端点重新获取整个帖子列表。
¥Earlier, we saw how we can use "tags" to invalidate parts of our cached data. We declared that the getPosts query endpoint provides a 'Post' tag, and that the addNewPost mutation endpoint invalidates that same 'Post' tag. That way, every time we add a new post, we force RTK Query to refetch the entire list of posts from the getQuery endpoint.
我们可以向 getPost 查询和 editPost 突变添加 'Post' 标签,但这也会强制重新获取所有其他单独的帖子。幸运的是,RTK Query 允许我们定义特定的标签,这让我们在使数据失效时更有选择性。这些特定标签看起来像 {type: 'Post', id: 123}。
¥We could add a 'Post' tag to both the getPost query and the editPost mutation, but that would force all the other individual posts to be refetched as well. Fortunately, RTK Query lets us define specific tags, which let us be more selective in invalidating data. These specific tags look like {type: 'Post', id: 123}.
我们的 getPosts 查询定义了一个 providesTags 字段,它是一个字符串数组。providesTags 字段还可以接受回调函数,该函数接收 result 和 arg,并返回一个数组。这使我们能够根据正在获取的数据的 ID 创建标签条目。同样,invalidatesTags 也可以是回调。
¥Our getPosts query defines a providesTags field that is an array of strings. The providesTags field can also accept a callback function that receives the result and arg, and returns an array. This allows us to create tag entries based on IDs of data that is being fetched. Similarly, invalidatesTags can be a callback as well.
为了获得正确的行为,我们需要使用正确的标签设置每个端点:
¥In order to get the right behavior, we need to set up each endpoint with the right tags:
-
getPosts:为整个列表提供通用'Post'标签,并为每个收到的帖子对象提供特定的{type: 'Post', id}标签¥
getPosts: provides a general'Post'tag for the whole list, as well as a specific{type: 'Post', id}tag for each received post object -
getPost:为单个帖子对象提供特定的{type: 'Post', id}对象¥
getPost: provides a specific{type: 'Post', id}object for the individual post object -
addNewPost:使常规'Post'标记无效,以重新获取整个列表¥
addNewPost: invalidates the general'Post'tag, to refetch the whole list -
editPost:使特定的{type: 'Post', id}标签无效。这将强制重新获取getPost中的单个帖子以及getPosts中的整个帖子列表,因为它们都提供了与{type, id}值匹配的标签。¥
editPost: invalidates the specific{type: 'Post', id}tag. This will force a refetch of both the individual post fromgetPost, as well as the entire list of posts fromgetPosts, because they both provide a tag that matches that{type, id}value.
export const apiSlice = createApi({
  reducerPath: 'api',
  baseQuery: fetchBaseQuery({ baseUrl: '/fakeApi' }),
  tagTypes: ['Post'],
  endpoints: builder => ({
    getPosts: builder.query<Post[], void>({
      query: () => '/posts',
      providesTags: (result = [], error, arg) => [
        'Post',
        ...result.map(({ id }) => ({ type: 'Post', id }) as const)
      ]
    }),
    getPost: builder.query<Post, string>({
      query: postId => `/posts/${postId}`,
      providesTags: (result, error, arg) => [{ type: 'Post', id: arg }]
    }),
    addNewPost: builder.mutation<Post, NewPost>({
      query: initialPost => ({
        url: '/posts',
        method: 'POST',
        body: initialPost
      }),
      invalidatesTags: ['Post']
    }),
    editPost: builder.mutation<Post, PostUpdate>({
      query: post => ({
        url: `posts/${post.id}`,
        method: 'PATCH',
        body: post
      }),
      invalidatesTags: (result, error, arg) => [{ type: 'Post', id: arg.id }]
    })
  })
})
如果响应没有数据或有错误,这些回调中的 result 参数可能是未定义的,因此我们必须安全地处理它。对于 getPosts,我们可以通过使用默认参数数组值进行映射来实现这一点,对于 getPost,我们已经根据参数 ID 返回一个单项数组。对于 editPost,我们从传递到触发函数的部分帖子对象中知道帖子的 ID,因此我们可以从那里读取它。
¥It's possible for the result argument in these callbacks to be undefined if the response has no data or there's an error, so we have to handle that safely. For getPosts we can do that by using a default argument array value to map over, and for getPost we're already returning a single-item array based on the argument ID. For editPost, we know the ID of the post from the partial post object that was passed into the trigger function, so we can read it from there.
完成这些更改后,让我们返回并尝试再次编辑帖子,并在浏览器 DevTools 中打开“网络”选项卡。
¥With those changes in place, let's go back and try editing a post again, with the Network tab open in the browser DevTools.

这次当我们保存编辑后的帖子时,我们应该看到两个请求连续发生:
¥When we save the edited post this time, we should see two requests happen back-to-back:
-
来自
editPost突变的PATCH /posts/:postId¥The
PATCH /posts/:postIdfrom theeditPostmutation -
重新获取
GET /posts/:postId作为getPost查询¥A
GET /posts/:postIdas thegetPostquery is refetched
然后,如果我们单击返回主 "帖子" 选项卡,我们还应该看到:
¥Then, if we click back to the main "Posts" tab, we should also see:
-
重新获取
GET /posts作为getPosts查询¥A
GET /postsas thegetPostsquery is refetched
因为我们使用标签提供端点之间的关系,所以 RTK 查询知道当我们进行编辑并且具有该 ID 的特定标签无效时,它需要重新获取单个帖子和帖子列表 - 无需进一步更改!同时,当我们编辑帖子时,getPosts 数据的缓存删除计时器到期,因此它已从缓存中删除。当我们再次打开 <PostsList> 组件时,RTK Query 发现它的缓存中没有数据并重新获取它。
¥Because we provided the relationships between the endpoints using tags, RTK Query knew that it needed to refetch the individual post and the list of posts when we made that edit and the specific tag with that ID was invalidated - no further changes needed! Meanwhile, as we were editing the post, the cache removal timer for the getPosts data expired, so it was removed from the cache. When we opened the <PostsList> component again, RTK Query saw that it did not have the data in cache and refetched it.
这里有一个警告。通过在 getPosts 中指定一个普通的 'Post' 标签并在 addNewPost 中使其无效,我们实际上最终也会强制重新获取所有单独的帖子。如果我们确实只想重新获取 getPosts 端点的帖子列表,你可以包含具有任意 ID 的附加标签(例如 {type: 'Post', id: 'LIST'}),然后使该标签无效。RTK 查询文档有 一个表格,描述如果某些通用/特定标签组合无效将会发生什么。
¥There is one caveat here. By specifying a plain 'Post' tag in getPosts and invalidating it in addNewPost, we actually end up forcing a refetch of all individual posts as well. If we really want to just refetch the list of posts for the getPosts endpoint, you can include an additional tag with an arbitrary ID, like {type: 'Post', id: 'LIST'}, and invalidate that tag instead. The RTK Query docs have a table that describes what will happen if certain general/specific tag combinations are invalidated.
RTK 查询还有许多其他选项用于控制何时以及如何重新获取数据,包括 "条件抓取"、"懒惰查询" 和 "prefetching",并且可以通过多种方式自定义查询定义。有关使用这些功能的更多详细信息,请参阅 RTK 查询使用指南文档:
¥RTK Query has many other options for controlling when and how to refetch data, including "conditional fetching", "lazy queries", and "prefetching", and query definitions can be customized in a variety of ways. See the RTK Query usage guide docs for more details on using these features:
更新 Toast 显示
¥Updating Toast Display
当我们从分派 thunk 添加帖子切换到使用 RTK 查询突变时,我们意外破坏了 "已添加新帖子" toast 消息行为,因为 addNewPost.fulfilled 操作不再被分派。
¥When we switched from dispatching thunks for adding posts to using an RTK Query mutation, we accidentally broke the "New post added" toast message behavior, because the addNewPost.fulfilled action is no longer getting dispatched.
幸运的是,这很容易修复。RTK Query 实际上在内部使用 createAsyncThunk,我们已经看到它在发出请求时分派 Redux 操作。我们可以更新 toast 监听器,以监视 RTKQ 的内部操作是否被分派,并在发生这种情况时显示 toast 消息。
¥Fortunately, this is simple to fix. RTK Query actually uses createAsyncThunk internally, and we've already seen that it dispatches Redux actions as the requests are made. We can update the toast listener to watch for RTKQ's internal actions being dispatched, and show the toast message when that happens.
createApi 会自动为每个端点在内部生成 thunk。它还会自动生成 RTK "matcher" 函数,它接受一个操作对象,如果操作符合某些条件,则返回 true。这些匹配器可用于任何需要检查操作是否符合给定条件的地方,例如 startAppListening 内部。它们还充当 TypeScript 类型保护,缩小 action 对象的 TS 类型,以便你可以安全地访问其字段。
¥createApi automatically generates thunks internally for each endpoint. It also automatically generates RTK "matcher" functions, which accept an action object and return true if the action matches some condition. These matchers can be used in any place that needs to check if an action matches a given condition, such as inside startAppListening. They also act as TypeScript type guards, narrowing the TS type of the action object so that you can safely access its fields.
目前,toast 监听器正在监视具有 actionCreator: addNewPost.fulfilled 的单个特定操作类型。我们将更新它以监视使用 matcher: apiSlice.endpoints.addNewPost.matchFulfilled 添加的帖子:
¥Currently, the toast listener is watching for the single specific action type with actionCreator: addNewPost.fulfilled. We'll update it to watch for the posts being added with matcher: apiSlice.endpoints.addNewPost.matchFulfilled:
import { createEntityAdapter, createSelector, createSlice, EntityState, PayloadAction } from '@reduxjs/toolkit'
import { client } from '@/api/client'

import type { RootState } from '@/app/store'
import { AppStartListening } from '@/app/listenerMiddleware'
import { createAppAsyncThunk } from '@/app/withTypes'

import { apiSlice } from '@/features/api/apiSlice'
import { logout } from '@/features/auth/authSlice'

// omit types, posts slice, and selectors

export const addPostsListeners = (startAppListening: AppStartListening) => {
  startAppListening({
    matcher: apiSlice.endpoints.addNewPost.matchFulfilled,
    effect: async (action, listenerApi) => {
现在,当我们添加帖子时,提示框应该会再次正确显示。
¥Now the toast should show correctly again when we add a post.
管理用户数据
¥Managing Users Data
我们已经完成将帖子数据管理转换为使用 RTK 查询。接下来,我们将转换用户列表。
¥We've finished converting our posts data management over to use RTK Query. Next up, we'll convert the list of users.
由于我们已经了解了如何使用 RTK 查询钩子来获取和读取数据,因此在本节中我们将尝试不同的方法。与 Redux Toolkit 的其余部分一样,RTK Query 的核心逻辑与 UI 无关,可以与任何 UI 层一起使用,而不仅仅是 React。
¥Since we've already seen how to use the RTK Query hooks for fetching and reading data, for this section we're going to try a different approach. Like the rest of Redux Toolkit, RTK Query's core logic is UI-agnostic and can be used with any UI layer, not just React.
通常,你应该使用 createApi 生成的 React 钩子,因为它们为你做了很多工作。但是,为了便于说明,我们将仅使用 RTK 查询核心 API 来处理用户数据,以便你了解如何使用它。
¥Normally you should use the React hooks that createApi generates, since they do a lot of work for you. But, for sake of illustration, here we're going to work with the user data using just the RTK Query core API so you can see how to use it.
手动获取用户
¥Fetching Users Manually
我们目前正在 usersSlice.ts 中定义 fetchUsers 异步 thunk,并在 main.tsx 中手动调度该 thunk,以便用户列表尽快可用。我们可以使用 RTK 查询执行相同的过程。
¥We're currently defining a fetchUsers async thunk in usersSlice.ts, and dispatching that thunk manually in main.tsx so that the list of users is available as soon as possible. We can do that same process using RTK Query.
我们首先在 apiSlice.ts 中定义 getUsers 查询端点,类似于我们现有的端点。我们将导出 useGetUsersQuery 钩子只是为了保持一致性,但现在我们不打算使用它。
¥We'll start by defining a getUsers query endpoint in apiSlice.ts, similar to our existing endpoints. We'll export the useGetUsersQuery hook just for consistency, but for now we're not going to use it.
import { createApi, fetchBaseQuery } from '@reduxjs/toolkit/query/react'

import type { Post, NewPost, PostUpdate } from '@/features/posts/postsSlice'
import type { User } from '@/features/users/usersSlice'

export type { Post }

export const apiSlice = createApi({
  reducerPath: 'api',
  baseQuery: fetchBaseQuery({ baseUrl: '/fakeApi' }),
  tagTypes: ['Post'],
  endpoints: builder => ({
    // omit other endpoints

    getUsers: builder.query<User[], void>({
      query: () => '/users'
    })
  })
})

export const {
  useGetPostsQuery,
  useGetPostQuery,
  useGetUsersQuery,
  useAddNewPostMutation,
  useEditPostMutation
} = apiSlice
如果我们检查 API 切片对象,它会包含一个 endpoints 字段,其中针对我们定义的每个端点都有一个端点对象。
¥If we inspect the API slice object, it includes an endpoints field, with one endpoint object inside for each endpoint we've defined.
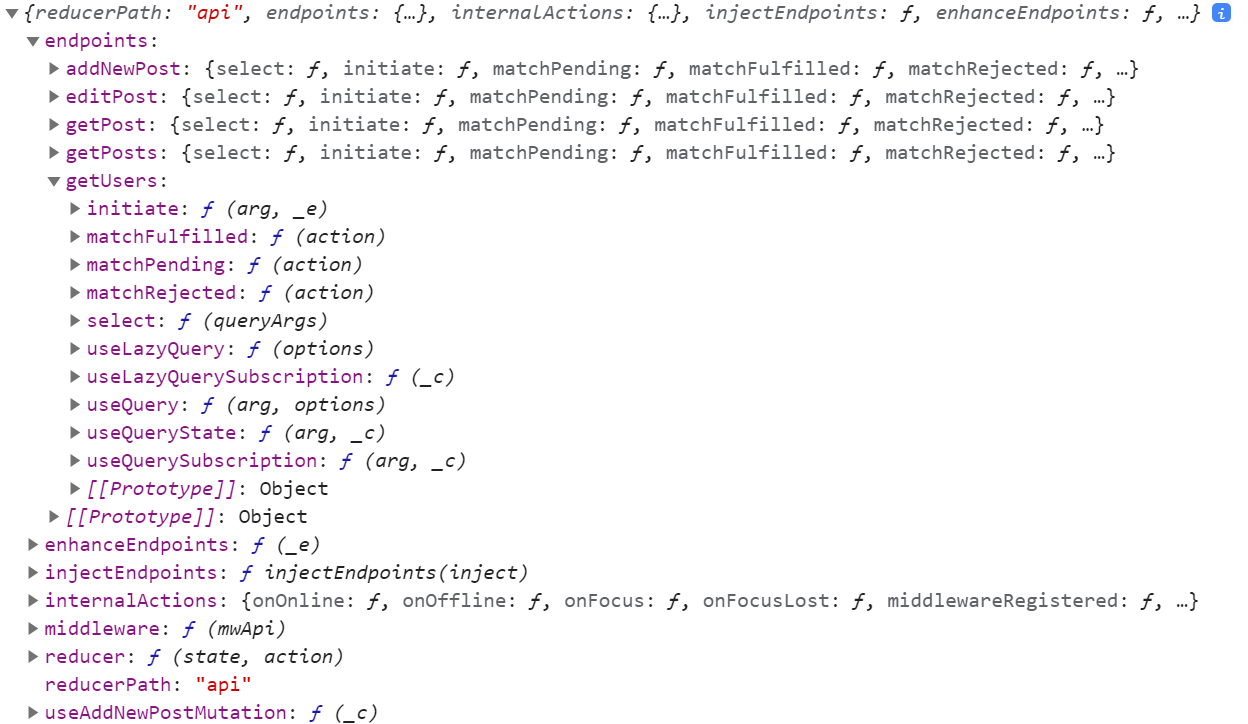
每个端点对象包含:
¥Each endpoint object contains:
-
我们从根 API 切片对象导出的相同主查询/突变钩子,但命名为
useQuery或useMutation¥The same primary query/mutation hook that we exported from the root API slice object, but named as
useQueryoruseMutation -
对于查询端点,针对 "懒惰查询" 或部分订阅等场景的一组附加查询钩子
¥For query endpoints, an additional set of query hooks for scenarios like "lazy queries" or partial subscriptions
-
一组 "matcher" 实用工具,用于检查此端点的请求所调度的
pending/fulfilled/rejected操作¥A set of "matcher" utilities to check for the
pending/fulfilled/rejectedactions dispatched by requests for this endpoint -
触发对此端点的请求的
initiatethunk¥An
initiatethunk that triggers a request for this endpoint -
select函数创建 记忆选择器,可以检索该端点的缓存结果数据 + 状态条目¥A
selectfunction that creates memoized selectors that can retrieve the cached result data + status entries for this endpoint
如果我们想获取 React 之外的用户列表,我们可以在索引文件中调度 getUsers.initiate() thunk:
¥If we want to fetch the list of users outside of React, we can dispatch the getUsers.initiate() thunk in our index file:
// omit other imports
import { apiSlice } from './features/api/apiSlice'

async function main() {
  // Start our mock API server
  await worker.start({ onUnhandledRequest: 'bypass' })

  store.dispatch(apiSlice.endpoints.getUsers.initiate())

  const root = createRoot(document.getElementById('root')!)

  root.render(
    <React.StrictMode>
      <Provider store={store}>
        <App />
      </Provider>
    </React.StrictMode>
  )
}
main()
此调度在查询钩子内部自动发生,但我们可以通过调度 initiate thunk 手动启动它(如果需要)。
¥This dispatch happens automatically inside the query hooks, but we can start it manually if needed by dispatching the initiate thunk.
请注意,我们没有为 initiate() 提供参数。这是因为我们的 getUsers 端点不需要特定的查询参数。从概念上讲,这等同于说“此缓存条目具有 undefined 的查询参数”。如果我们确实需要参数,我们会将它们传递给 thunk,例如 dispatch(apiSlice.endpoints.getPokemon.initiate('pikachu'))。
¥Note that we didn't provide an argument to initiate(). That's because our getUsers endpoint doesn't need a specific query argument. Conceptually, this is the same as saying "this cache entry has a query argument of undefined". If we did need arguments, we'd pass them to the thunk, like dispatch(apiSlice.endpoints.getPokemon.initiate('pikachu')).
在这种情况下,我们手动调度 thunk 以开始预取我们应用的设置函数中的数据。实际上,你可能希望在 React-Router 的 "数据加载器" 中进行预取以在渲染组件之前启动请求。(请参阅 React-Router 上的 RTK repo 讨论线程加载器 了解一些想法。)
¥In this case, we're manually dispatching the thunk to start prefetching the data in our app's setup function. In practice, you may want to do the prefetching in React-Router's "data loaders" to start the requests before the components are rendered. (See the RTK repo discussion thread on React-Router loaders for some ideas.)
手动发送 RTKQ 请求 thunk 将创建一个订阅条目,但这取决于你 稍后取消订阅该数据 - 否则数据将永久保留在缓存中。在这种情况下,我们总是需要用户数据,因此我们可以跳过取消订阅。
¥Manually dispatching an RTKQ request thunk will create a subscription entry, but it's then up to you to unsubscribe from that data later - otherwise the data stays in the cache permanently. In this case, we always need user data, so we can skip unsubscribing.
选择用户数据
¥Selecting Users Data
目前,我们有 selectAllUsers 和 selectUserById 这样的选择器,它们由 createEntityAdapter 用户适配器生成,并从 state.users 读取。如果我们重新加载页面,所有与用户相关的显示都会被破坏,因为 state.users 切片没有数据。现在我们正在为 RTK 查询的缓存获取数据,我们应该将这些选择器替换为从缓存中读取的等效选择器。
¥We currently have selectors like selectAllUsers and selectUserById that are generated by our createEntityAdapter users adapter, and are reading from state.users. If we reload the page, all of our user-related display is broken because the state.users slice has no data. Now that we're fetching data for RTK Query's cache, we should replace those selectors with equivalents that read from the cache instead.
每次调用 API 切片端点中的 endpoint.select() 函数时,都会创建一个新的记忆选择器函数。select() 将缓存键作为其参数,并且该键必须与作为参数传递给查询钩子或 initiate() thunk 的缓存键相同。生成的选择器使用该缓存键来确切地知道它应该从存储中的缓存状态返回哪个缓存结果。
¥The endpoint.select() function in the API slice endpoints will create a new memoized selector function every time we call it. select() takes a cache key as its argument, and this must be the same cache key that you pass as an argument to either the query hooks or the initiate() thunk. The generated selector uses that cache key to know exactly which cached result it should return from the cache state in the store.
在这种情况下,我们的 getUsers 端点不需要任何参数 - 我们总是获取整个用户列表。因此,我们可以创建一个没有参数的缓存选择器(这与传递 undefined 的缓存键相同)。
¥In this case, our getUsers endpoint doesn't need any parameters - we always fetch the entire list of users. So, we can create a cache selector with no argument (which is the same as passing a cache key of undefined).
我们可以更新 usersSlice.ts,使其选择器基于 RTKQ 查询缓存,而不是实际的 usersSlice 调用:
¥We can update usersSlice.ts to base its selectors on the RTKQ query cache instead of the actual usersSlice call:
import {
  createEntityAdapter,
  createSelector,
  createSlice
} from '@reduxjs/toolkit'

import { client } from '@/api/client'

import type { RootState } from '@/app/store'
import { createAppAsyncThunk } from '@/app/withTypes'

import { apiSlice } from '@/features/api/apiSlice'
import { selectCurrentUsername } from '@/features/auth/authSlice'

export interface User {
  id: string
  name: string
}

// omit `fetchUsers` and `usersSlice`

const emptyUsers: User[] = []

// Calling `someEndpoint.select(someArg)` generates a new selector that will return
// the query result object for a query with those parameters.
// To generate a selector for a specific query argument, call `select(theQueryArg)`.
// In this case, the users query has no params, so we don't pass anything to select()
export const selectUsersResult = apiSlice.endpoints.getUsers.select()

export const selectAllUsers = createSelector(
  selectUsersResult,
  usersResult => usersResult?.data ?? emptyUsers
)

export const selectUserById = createSelector(
  selectAllUsers,
  (state: RootState, userId: string) => userId,
  (users, userId) => users.find(user => user.id === userId)
)

export const selectCurrentUser = (state: RootState) => {
  const currentUsername = selectCurrentUsername(state)
  if (currentUsername) {
    return selectUserById(state, currentUsername)
  }
}

/* Temporarily ignore adapter selectors - we'll come back to this later
export const { selectAll: selectAllUsers, selectById: selectUserById } = usersAdapter.getSelectors(
  (state: RootState) => state.users,
)
*/
我们首先创建一个知道如何检索正确缓存条目的特定 selectUsersResult 选择器实例。
¥We start by creating a specific selectUsersResult selector instance that knows how to retrieve the right cache entry.
一旦我们有了初始 selectUsersResult 选择器,我们就可以用从缓存结果中返回用户数组的选择器替换现有的 selectAllUsers 选择器。由于可能还没有有效的结果,我们回到 emptyUsers 数组。我们还将用从该数组中找到正确用户的 selectUserById 替换 selectUserById。
¥Once we have that initial selectUsersResult selector, we can replace the existing selectAllUsers selector with one that returns the array of users from the cache result. Since there might not be a valid result yet, we fall back to an emptyUsers array. We'll also replace selectUserById with one that finds the right user from that array.
现在我们将注释掉 usersAdapter 中的那些选择器 - 稍后我们将进行另一项更改,切换回使用这些。
¥For now we're going to comment out those selectors from the usersAdapter - we're going to make another change later that switches back to using those.
我们的组件已经导入了 selectAllUsers、selectUserById 和 selectCurrentUser,所以这个改变应该可以正常工作!尝试刷新页面并单击帖子列表和单个帖子视图。正确的用户名应出现在每个显示的帖子中以及 <AddPostForm>.txt 的下拉列表中。
¥Our components are already importing selectAllUsers, selectUserById, and selectCurrentUser, so this change should just work! Try refreshing the page and clicking through the posts list and single post view. The correct user names should appear in each displayed post, and in the dropdown in the <AddPostForm>.
请注意,这是使用选择器使代码更易于维护的一个很好的例子!我们的组件已经调用了这些选择器,因此它们不关心数据是来自现有的 usersSlice 状态,还是来自 RTK 查询缓存条目,只要选择器返回预期的数据即可。我们能够更改选择器实现,而根本不需要更新 UI 组件。
¥Note that this is a great example of how using selectors makes the code more maintainable! We already had our components calling these selectors, so they don't care whether the data is coming from the existing usersSlice state, or from an RTK Query cache entry, as long as the selectors return the expected data. We were able to change out the selector implementations and didn't have to update the UI components at all.
由于 usersSlice 状态不再被使用,我们可以继续从此文件中删除 const usersSlice = createSlice() 调用和 fetchUsers thunk,并从我们的存储设置中删除 users: usersReducer。我们仍然有一些引用 postsSlice 的代码,所以我们还不能完全删除它 - 我们很快就会讨论这个问题。
¥Since the usersSlice state is no longer even being used at all, we can go ahead and delete the const usersSlice = createSlice() call and the fetchUsers thunk from this file, and remove users: usersReducer from our store setup. We've still got a couple bits of code that reference postsSlice, so we can't quite remove that yet - we'll get to that shortly.
拆分和注入端点
¥Splitting and Injecting Endpoints
我们说过,RTK 查询通常每个应用都有一个 "API 切片",到目前为止,我们已经直接在 apiSlice.ts 中定义了所有端点。但是,大型应用通常会将 "code-split" 功能分成单独的包,然后在第一次使用该功能时根据需要对它们进行 "惰性加载"。。如果我们想要对某些端点定义进行代码分割,或者将它们移动到另一个文件中以防止 API 切片文件变得太大,会发生什么?
¥We said that RTK Query normally has a single "API slice" per application, and so far we've defined all of our endpoints directly in apiSlice.ts. But, it's common for larger applications to "code-split" features into separate bundles, and then "lazy load" them on demand as the feature is used for the first time. . What happens if we want to code-split some of our endpoint definitions, or move them into another file to keep the API slice file from getting too big?
RTK 查询支持使用 apiSlice.injectEndpoints() 拆分端点定义。这样,我们仍然可以拥有一个 API 切片实例,一个中间件和缓存 Reducer,但我们可以将一些端点的定义移动到其他文件。这可以实现代码分割场景,并在需要时将一些端点与功能文件夹共置。
¥RTK Query supports splitting out endpoint definitions with apiSlice.injectEndpoints(). That way, we can still have a single API slice instance, with a single middleware and cache reducer, but we can move the definition of some endpoints to other files. This enables code-splitting scenarios, as well as co-locating some endpoints alongside feature folders if desired.
为了说明这个过程,我们将 getUsers 端点切换为注入到 usersSlice.ts 中,而不是在 apiSlice.ts 中定义。
¥To illustrate this process, let's switch the getUsers endpoint to be injected in usersSlice.ts, instead of defined in apiSlice.ts.
我们已经将 apiSlice 导入到 usersSlice.ts 中,以便我们可以访问 getUsers 端点,因此我们可以在此处切换为调用 apiSlice.injectEndpoints()。
¥We're already importing apiSlice into usersSlice.ts so that we can access the getUsers endpoint, so we can switch to calling apiSlice.injectEndpoints() here instead.
import { apiSlice } from '../api/apiSlice'

// This is the _same_ reference as `apiSlice`, but this has
// the TS types updated to include the injected endpoints
export const apiSliceWithUsers = apiSlice.injectEndpoints({
  endpoints: builder => ({
    getUsers: builder.query<User[], void>({
      query: () => '/users'
    })
  })
})

export const { useGetUsersQuery } = apiSliceWithUsers

export const selectUsersResult = apiSliceWithUsers.endpoints.getUsers.select()
injectEndpoints() 改变原始 API 切片对象以添加其他端点定义,然后返回相同的 API 引用。此外,injectEndpoints 的返回值包含来自注入端点的其他 TS 类型。
¥injectEndpoints() mutates the original API slice object to add the additional endpoint definitions, and then returns the same API reference. Additionally, the return value of injectEndpoints has the additional TS types from the injected endpoints included.
因此,我们应该将其保存为具有不同名称的新变量,以便我们可以使用更新的 TS 类型,让所有内容正确编译,并提醒自己我们正在使用哪个版本的 API 切片。在这里,我们将其称为 apiSliceWithUsers,以区别于原始 apiSlice。
¥Because of that, we should save this as a new variable with a different name, so that we can use the updated TS types, have everything compile correctly, and remind ourselves which version of the API slice we're using. Here, we'll call it apiSliceWithUsers to differentiate it from the original apiSlice.
目前,引用 getUsers 端点的唯一文件是我们的入口点文件,它正在调度 initiate thunk。我们需要更新它以导入扩展的 API 切片:
¥At the moment, the only file that references the getUsers endpoint is our entry point file, which is dispatching the initiate thunk. We need to update that to import the extended API slice instead:
import { apiSliceWithUsers } from './features/users/usersSlice'

import { worker } from './api/server'

import './index.css'

// Wrap app rendering so we can wait for the mock API to initialize
async function start() {
  // Start our mock API server
  await worker.start({ onUnhandledRequest: 'bypass' })

  store.dispatch(apiSliceWithUsers.endpoints.getUsers.initiate())

  const root = createRoot(document.getElementById('root')!)

  root.render(
    <React.StrictMode>
      <Provider store={store}>
        <App />
      </Provider>
    </React.StrictMode>
  )
}
或者,你可以从切片文件中导出特定端点本身,就像我们在切片中对动作创建者所做的一样。
¥Alternately, you could just export the specific endpoints themselves from the slice file, the same way we've done with action creators in slices.
操作响应数据
¥Manipulating Response Data
到目前为止,我们所有的查询端点都简单地存储了来自服务器的响应数据,与正文中接收到的数据完全相同。getPosts 和 getUsers 都期望服务器返回一个数组,而 getPost 期望单个 Post 对象作为主体。
¥So far, all of our query endpoints have simply stored the response data from the server exactly as it was received in the body. getPosts and getUsers both expect the server to return an array, and getPost expects the individual Post object as the body.
客户端通常需要从服务器响应中提取数据片段,或者在缓存数据之前以某种方式转换数据。例如,如果 /getPost 请求返回类似 {post: {id}} 的正文,并且数据嵌套,该怎么办?
¥It's common for clients to need to extract pieces of data from the server response, or to transform the data in some way before caching it. For example, what if the /getPost request returns a body like {post: {id}}, with the data nested?
我们可以通过几种方法从概念上处理这个问题。一种选择是提取 responseData.post 字段并将其存储在缓存中,而不是整个正文。另一种方法是将整个响应数据存储在缓存中,但让我们的组件仅指定它们需要的缓存数据的特定部分。
¥There's a couple ways that we could handle this conceptually. One option would be to extract the responseData.post field and store that in the cache, instead of the entire body. Another would be to store the entire response data in the cache, but have our components specify just a specific piece of that cached data that they need.
转变反应
¥Transforming Responses
端点可以定义一个 transformResponse 处理程序,该处理程序可以在缓存之前提取或修改从服务器接收的数据。例如,如果 getPost 返回 {post: {id}},我们可以有 transformResponse: (responseData) => responseData.post,它只会缓存实际的 Post 对象,而不是整个响应主体。
¥Endpoints can define a transformResponse handler that can extract or modify the data received from the server before it's cached. For example, if getPost returned {post: {id}}, we could have transformResponse: (responseData) => responseData.post, and it would cache just the actual Post object instead of the entire body of the response.
在 第 6 部分:性能和标准化 中,我们讨论了为什么以规范化结构存储数据有用的原因。特别是,它允许我们根据 ID 查找和更新项目,而不必循环遍历数组来查找正确的项目。
¥In Part 6: Performance and Normalization, we discussed reasons why it's useful to store data in a normalized structure. In particular, it lets us look up and update items based on an ID, rather than having to loop over an array to find the right item.
我们的 selectUserById 选择器当前必须循环缓存的用户数组才能找到正确的 User 对象。如果我们要使用标准化方法来转换要存储的响应数据,我们可以简化它以直接通过 ID 查找用户。
¥Our selectUserById selector currently has to loop over the cached array of users to find the right User object. If we were to transform the response data to be stored using a normalized approach, we could simplify that to directly find the user by ID.
我们之前在 usersSlice 中使用 createEntityAdapter 来管理规范化的用户数据。我们可以将 createEntityAdapter 集成到 extendedApiSlice 中,并在缓存数据之前实际使用 createEntityAdapter 来转换数据。我们将取消注释最初的 usersAdapter 行,并再次使用其更新函数和选择器。
¥We were previously using createEntityAdapter in usersSlice to manage normalized users data. We can integrate createEntityAdapter into our extendedApiSlice, and actually use createEntityAdapter to transform the data before it's cached. We'll uncomment the usersAdapter lines we originally had, and use its update functions and selectors again.
import {
  createSelector,
  createEntityAdapter,
  EntityState
} from '@reduxjs/toolkit'

import type { RootState } from '@/app/store'

import { apiSlice } from '@/features/api/apiSlice'
import { selectCurrentUsername } from '@/features/auth/authSlice'

export interface User {
  id: string
  name: string
}

const usersAdapter = createEntityAdapter<User>()
const initialState = usersAdapter.getInitialState()

// This is the _same_ reference as `apiSlice`, but this has
// the TS types updated to include the injected endpoints
export const apiSliceWithUsers = apiSlice.injectEndpoints({
  endpoints: builder => ({
    getUsers: builder.query<EntityState<User, string>, void>({
      query: () => '/users',
      transformResponse(res: User[]) {
        // Create a normalized state object containing all the user items
        return usersAdapter.setAll(initialState, res)
      }
    })
  })
})

export const { useGetUsersQuery } = apiSliceWithUsers

// Calling `someEndpoint.select(someArg)` generates a new selector that will return
// the query result object for a query with those parameters.
// To generate a selector for a specific query argument, call `select(theQueryArg)`.
// In this case, the users query has no params, so we don't pass anything to select()
export const selectUsersResult = apiSliceWithUsers.endpoints.getUsers.select()
const selectUsersData = createSelector(
  selectUsersResult,
  // Fall back to the empty entity state if no response yet.
  result => result.data ?? initialState
)

export const selectCurrentUser = (state: RootState) => {
  const currentUsername = selectCurrentUsername(state)
  if (currentUsername) {
    return selectUserById(state, currentUsername)
  }
}

export const { selectAll: selectAllUsers, selectById: selectUserById } =
  usersAdapter.getSelectors(selectUsersData)
我们向 getUsers 端点添加了 transformResponse 选项。它接收整个响应数据主体作为其参数(在本例中为 User[] 数组),并应返回要缓存的实际数据。通过调用 usersAdapter.setAll(initialState, responseData),它将返回包含所有接收到的项目的标准 {ids: [], entities: {}} 规范化数据结构。我们需要告诉 TS,我们现在将 EntityState<User, string> 数据作为缓存条目的 data 字段的实际内容返回。
¥We've added a transformResponse option to the getUsers endpoint. It receives the entire response data body as its argument (in this case, a User[] array), and should return the actual data to be cached. By calling usersAdapter.setAll(initialState, responseData), it will return the standard {ids: [], entities: {}} normalized data structure containing all of the received items. We need to tell TS that we're now returning that EntityState<User, string> data as the actual contents of the cache entry's data field.
需要为 adapter.getSelectors() 函数提供 "输入选择器",以便它知道在哪里可以找到标准化数据。在这种情况下,数据嵌套在 RTK 查询缓存缩减器内,因此我们从缓存状态中选择正确的字段。为了保持一致,我们可以编写一个 selectUsersData 选择器,如果尚未获取数据,则返回到初始的空规范化状态。
¥The adapter.getSelectors() function needs to be given an "input selector" so it knows where to find that normalized data. In this case, the data is nested down inside the RTK Query cache reducer, so we select the right field out of the cache state. To make things consistent, we can write a selectUsersData selector that falls back to the initial empty normalized state if we haven't yet fetched the data.
规范化与文档缓存
¥Normalized vs Document Caches
值得退后一步讨论一下我们刚刚做了什么以及它为什么重要。
¥It's worth stepping back for a minute to discuss what we just did and why it matters.
你可能听说过与 Apollo 等其他数据获取库相关的术语 "标准化缓存"。重要的是要了解 RTK 查询使用 "文档缓存" 方法,而不是 "标准化缓存"。
¥You may have heard the term "normalized cache" in relation to other data fetching libraries like Apollo. It's important to understand that RTK Query uses a "document cache" approach, not a "normalized cache".
完全规范化的缓存会尝试根据项目类型和 ID 在所有查询中删除重复的相似项目。举个例子,假设我们有一个带有 getTodos 和 getTodo 端点的 API 切片,并且我们的组件进行以下查询:
¥A fully normalized cache tries to deduplicate similar items across all queries, based on item type and ID. As an example, say that we have an API slice with getTodos and getTodo endpoints, and our components make the following queries:
-
getTodos() -
getTodos({filter: 'odd'}) -
getTodo({id: 1})
每个查询结果都将包含一个类似于 {id: 1} 的 Todo 对象。
¥Each of these query results would include a Todo object that looks like {id: 1}.
在完全规范化的数据去重缓存中,只会存储此 Todo 对象的单个副本。然而,RTK Query 将每个查询结果独立保存在缓存中。因此,这将导致该 Todo 的三个独立副本缓存在 Redux 存储中。但是,如果所有端点始终提供相同的标签(例如 {type: 'Todo', id: 1}),则使该标签无效将强制所有匹配的端点重新获取其数据以保持一致性。
¥In a fully normalized deduplicating cache, only a single copy of this Todo object would be stored. However, RTK Query saves each query result independently in the cache. So, this would result in three separate copies of this Todo being cached in the Redux store. However, if all the endpoints are consistently providing the same tags (such as {type: 'Todo', id: 1}), then invalidating that tag will force all the matching endpoints to refetch their data for consistency.
RTK 查询故意不实现可跨多个请求删除重复项的缓存。有几个原因:
¥RTK Query deliberately does not implement a cache that would deduplicate identical items across multiple requests. There are several reasons for this:
-
完全标准化的跨查询共享缓存是一个很难解决的问题
¥A fully normalized shared-across-queries cache is a hard problem to solve
-
我们现在没有时间、资源或兴趣来尝试解决这个问题
¥We don't have the time, resources, or interest in trying to solve that right now
-
在许多情况下,当数据失效时简单地重新获取数据效果很好并且更容易理解
¥In many cases, simply re-fetching data when it's invalidated works well and is easier to understand
-
RTKQ 的主要目标是帮助解决 "获取一些数据" 的一般用例,这对很多人来说是一个很大的痛点
¥The main goal of RTKQ is to help solve the general use case of "fetch some data", which is a big pain point for a lot of people
在这种情况下,我们只是规范化了 getUsers 端点的响应数据,因为它被存储为 {[id]: value} 查找表。然而,这和 "标准化缓存" 不一样 - 我们只是改变了这一响应的存储方式,而不是跨端点或请求删除重复的结果。
¥In this case, we just normalized the response data for the getUsers endpoint, in that it's being stored as an {[id]: value} lookup table. However, this is not the same thing as a "normalized cache" - we only transformed how this one response is stored rather than deduplicating results across endpoints or requests.
从结果中选择值
¥Selecting Values from Results
从旧 postsSlice 读取的最后一个组件是 <UserPage>,它根据当前用户过滤帖子列表。我们已经看到,我们可以使用 useGetPostsQuery() 获取整个帖子列表,然后在组件中对其进行转换,例如在 useMemo 内部进行排序。查询钩子还使我们能够通过提供 selectFromResult 选项来选择缓存状态的片段,并且仅在所选片段发生更改时才重新渲染。
¥The last component that is reading from the old postsSlice is <UserPage>, which filters the list of posts based on the current user. We've already seen that we can get the entire list of posts with useGetPostsQuery() and then transform it in the component, such as sorting inside of a useMemo. The query hooks also give us the ability to select pieces of the cached state by providing a selectFromResult option, and only re-render when the selected pieces change.
useQuery 钩子始终将缓存键参数作为第一个参数,如果需要提供钩子选项,则必须始终是第二个参数,如 useSomeQuery(cacheKey, options)。在这种情况下,getUsers 端点没有任何实际的缓存键参数。从语义上讲,这与 undefined 的缓存键相同。因此,为了向钩子提供选项,我们必须调用 useGetUsersQuery(undefined, options)。
¥The useQuery hooks always take the cache key argument as the first parameter, and if you need to provide hook options, that must always be the second parameter, like useSomeQuery(cacheKey, options). In this case, the getUsers endpoint doesn't have any actual cache key argument. Semantically, this is the same as a cache key of undefined. So, in order to provide options to the hook, we have to call useGetUsersQuery(undefined, options).
我们可以使用 selectFromResult 让 <UserPage> 从缓存中读取经过过滤的帖子列表。然而,为了让 selectFromResult 避免不必要的重新渲染,我们需要确保我们提取的任何数据都被正确记忆。为此,我们应该创建一个新的选择器实例,<UserPage> 组件可以在每次渲染时重用该实例,以便选择器根据其输入记住结果。
¥We can use selectFromResult to have <UserPage> read just a filtered list of posts from the cache. However, in order for selectFromResult to avoid unnecessary re-renders, we need to ensure that whatever data we extract is memoized correctly. To do this, we should create a new selector instance that the <UserPage> component can reuse every time it renders, so that the selector memoizes the result based on its inputs.
import { Link, useParams } from 'react-router-dom'
import { createSelector } from '@reduxjs/toolkit'
import type { TypedUseQueryStateResult } from '@reduxjs/toolkit/query/react'

import { useAppSelector } from '@/app/hooks'

import { useGetPostsQuery, Post } from '@/features/api/apiSlice'

import { selectUserById } from './usersSlice'

// Create a TS type that represents "the result value passed
// into the `selectFromResult` function for this hook"
type GetPostSelectFromResultArg = TypedUseQueryStateResult<Post[], any, any>

const selectPostsForUser = createSelector(
  (res: GetPostSelectFromResultArg) => res.data,
  (res: GetPostSelectFromResultArg, userId: string) => userId,
  (data, userId) => data?.filter(post => post.user === userId)
)

export const UserPage = () => {
  const { userId } = useParams()

  const user = useAppSelector(state => selectUserById(state, userId!))

  // Use the same posts query, but extract only part of its data
  const { postsForUser } = useGetPostsQuery(undefined, {
    selectFromResult: result => ({
      // Optional: Include all of the existing result fields like `isFetching`
      ...result,
      // Include a field called `postsForUser` in the result object,
      // which will be a filtered list of posts
      postsForUser: selectPostsForUser(result, userId!)
    })
  })

  // omit rendering logic
}
与我们在这里创建的记忆选择器函数有一个关键的区别。通常,选择器期望整个 Redux state 作为他们的第一个参数,并从 state 中提取或导出一个值。然而,在这种情况下,我们只处理保存在缓存中的 "result" 值。结果对象内部有一个 data 字段,其中包含我们需要的实际值,以及一些请求元数据字段。
¥There's a key difference with the memoized selector function we've created here. Normally, selectors expect the entire Redux state as their first argument, and extract or derive a value from state. However, in this case we're only dealing with the "result" value that is kept in the cache. The result object has a data field inside with the actual values we need, as well as some of the request metadata fields.
因为这个选择器接收的不是通常的 RootState 类型作为其第一个参数,所以我们需要告诉 TS 该结果值是什么样的。RTK Query 包导出一个名为 TypedUseQueryStateResult 的 TS 类型,它表示“useQuery 钩子返回对象的类型”。我们可以使用它来声明我们期望结果包含 Post[] 数组,然后使用该类型定义我们的选择器。
¥Because this selector is receiving something other than the usual RootState type as its first argument, we need to tell TS what that result value looks like. The RTK Query package exports a TS type called TypedUseQueryStateResult that represents "the type of the useQuery hook return object". We can use that to declare that we expect the result to include a Post[] array, and then define our selector using that type.
从 RTK 2.x 和 Reselect 5.x 开始,记忆选择器具有 无限缓存大小,因此更改参数仍应保留早期记忆结果。如果你使用的是 RTK 1.x 或 Reselect 4.x,请注意 memoized 选择器仅具有默认缓存大小 1。你需要 为每个创建唯一的选择器实例组件 来确保选择器在传递不同的参数(如 ID)时始终保持记忆。
¥As of RTK 2.x and Reselect 5.x, memoized selectors have an infinite cache size, so changing the arguments should still keep earlier memoized results available. If you're using RTK 1.x or Reselect 4.x, note that memoized selectors only have a default cache size of 1. You'll need to create a unique selector instance per component to ensure the selector memoizes consistently when passed different arguments like IDs.
我们的 selectFromResult 回调从服务器接收包含原始请求元数据的 result 对象和 data,并且应该返回一些提取或派生的值。因为查询钩子为此处返回的任何内容添加了额外的 refetch 方法,所以 selectFromResult 应该始终返回一个包含你需要的字段的对象。
¥Our selectFromResult callback receives the result object containing the original request metadata and the data from the server, and should return some extracted or derived values. Because query hooks add an additional refetch method to whatever is returned here, selectFromResult should always return an object with the fields inside that you need inside.
由于 result 保存在 Redux 存储中,因此我们无法更改它 - 我们需要返回一个新对象。查询钩子将对此返回的对象进行 "shallow" 比较,并且仅在其中一个字段发生更改时重新渲染组件。我们可以通过仅返回该组件所需的特定字段来优化重新渲染 - 如果我们不需要其余的元数据标志,我们可以完全省略它们。如果你确实需要它们,你可以扩展原始 result 值以将它们包含在输出中。
¥Since result is being kept in the Redux store, we can't mutate it - we need to return a new object. The query hook will do a "shallow" comparison on this returned object, and only re-render the component if one of the fields has changed. We can optimize re-renders by only returning the specific fields needed by this component - if we don't need the rest of the metadata flags, we could omit them entirely. If you do need them, you can spread the original result value to include them in the output.
在本例中,我们将调用字段 postsForUser,并且可以从钩子结果中解构该新字段。通过每次调用 selectPostsForUser(result, userId),它都会记住过滤后的数组,并且只有在获取的数据或用户 ID 发生变化时才重新计算它。
¥In this case, we'll call the field postsForUser, and we can destructure that new field from the hook result. By calling selectPostsForUser(result, userId) every time, it will memoize the filtered array and only recalculate it if the fetched data or the user ID changes.
比较转型方法
¥Comparing Transformation Approaches
我们现在已经看到了管理转变响应的三种不同方法:
¥We've now seen three different ways that we can manage transforming responses:
-
将原始响应保留在缓存中,读取组件中的完整结果并导出值
¥Keep original response in cache, read full result in component and derive values
-
将原始响应保留在缓存中,使用
selectFromResult读取派生结果¥Keep original response in cache, read derived result with
selectFromResult -
在存储到缓存之前转换响应
¥Transform response before storing in cache
这些方法中的每一种都可以在不同的情况下发挥作用。以下是一些关于何时应考虑使用它们的建议:
¥Each of these approaches can be useful in different situations. Here's some suggestions for when you should consider using them:
-
transformResponse:端点的所有使用者都需要特定的格式,例如标准化响应以实现按 ID 更快的查找¥
transformResponse: all consumers of the endpoint want a specific format, such as normalizing the response to enable faster lookups by ID -
selectFromResult:端点的某些消费者只需要部分数据,例如过滤后的列表¥
selectFromResult: some consumers of the endpoint only need partial data, such as a filtered list -
每个组件/
useMemo:当只有某些特定组件需要转换缓存数据时¥per-component /
useMemo: when only some specific components need to transform the cached data
高级缓存更新
¥Advanced Cache Updates
我们已经完成了帖子和用户数据的更新,所以剩下的就是处理反应和通知。将这些切换为使用 RTK 查询将使我们有机会尝试一些可用于处理 RTK 查询的缓存数据的高级技术,并使我们能够为用户提供更好的体验。
¥We've completed updating our posts and users data, so all that's left is working with reactions and notifications. Switching these to use RTK Query will give us a chance to try out some of the advanced techniques available for working with RTK Query's cached data, and allow us to provide a better experience for our users.
持续反应
¥Persisting Reactions
最初,我们只跟踪客户端的反应,并没有将它们持久化到服务器。让我们添加一个新的 addReaction 突变,并在用户每次单击反应按钮时使用它来更新服务器上相应的 Post。
¥Originally, we only tracked reactions on the client side and did not persist them to the server. Let's add a new addReaction mutation and use that to update the corresponding Post on the server every time the user clicks a reaction button.
export const apiSlice = createApi({
  reducerPath: 'api',
  baseQuery: fetchBaseQuery({ baseUrl: '/fakeApi' }),
  tagTypes: ['Post'],
  endpoints: builder => ({
    // omit other endpoints
    addReaction: builder.mutation<
      Post,
      { postId: string; reaction: ReactionName }
    >({
      query: ({ postId, reaction }) => ({
        url: `posts/${postId}/reactions`,
        method: 'POST',
        // In a real app, we'd probably need to base this on user ID somehow
        // so that a user can't do the same reaction more than once
        body: { reaction }
      }),
      invalidatesTags: (result, error, arg) => [
        { type: 'Post', id: arg.postId }
      ]
    })
  })
})

export const {
  useGetPostsQuery,
  useGetPostQuery,
  useAddNewPostMutation,
  useEditPostMutation,
  useAddReactionMutation
} = apiSlice
与我们的其他突变类似,我们采用一些参数并向服务器发出请求,并在请求正文中包含一些数据。由于这个示例应用很小,我们将只给出反应的名称,并让服务器在这篇文章中增加该反应类型的计数器。
¥Similar to our other mutations, we take some parameters and make a request to the server, with some data in the body of the request. Since this example app is small, we'll just give the name of the reaction, and let the server increment the counter for that reaction type on this post.
我们已经知道我们需要重新获取这篇文章才能看到客户端上的任何数据更改,因此我们可以根据其 ID 使该特定 Post 条目无效。
¥We already know that we need to refetch this post in order to see any of the data change on the client, so we can invalidate this specific Post entry based on its ID.
完成后,让我们更新 <ReactionButtons> 以使用此突变。
¥With that in place, let's update <ReactionButtons> to use this mutation.
import { useAddReactionMutation } from '@/features/api/apiSlice'

import type { Post, ReactionName } from './postsSlice'

const reactionEmoji: Record<ReactionName, string> = {
  thumbsUp: '👍',
  tada: '🎉',
  heart: '❤️',
  rocket: '🚀',
  eyes: '👀'
}

interface ReactionButtonsProps {
  post: Post
}

export const ReactionButtons = ({ post }: ReactionButtonsProps) => {
  const [addReaction] = useAddReactionMutation()

  const reactionButtons = Object.entries(reactionEmoji).map(
    ([stringName, emoji]) => {
      // Ensure TS knows this is a _specific_ string type
      const reaction = stringName as ReactionName
      return (
        <button
          key={reaction}
          type="button"
          className="muted-button reaction-button"
          onClick={() => {
            addReaction({ postId: post.id, reaction })
          }}
        >
          {emoji} {post.reactions[reaction]}
        </button>
      )
    }
  )

  return <div>{reactionButtons}</div>
}
让我们看看实际效果!转到主 <PostsList>,然后单击其中一个反应,看看会发生什么。
¥Let's see this in action! Go to the main <PostsList>, and click one of the reactions to see what happens.

呃哦。整个 <PostsList> 组件呈灰色,因为我们刚刚重新获取了整个帖子列表以响应更新的一篇帖子。这是故意更明显的,因为我们的模拟 API 服务器设置为在响应之前有 2 秒的延迟,但即使响应速度更快,这仍然不是一个良好的用户体验。
¥Uh-oh. The entire <PostsList> component was grayed out, because we just refetched the entire list of posts in response to that one post being updated. This is deliberately more visible because our mock API server is set to have a 2-second delay before responding, but even if the response is faster, this still isn't a good user experience.
对反应的乐观更新
¥Optimistic Updates for Reactions
对于添加反应之类的小更新,我们可能不需要重新获取整个帖子列表。相反,我们可以尝试只更新客户端上已缓存的数据,以匹配我们期望在服务器上发生的情况。此外,如果我们立即更新缓存,用户在单击按钮时会得到即时反馈,而不必等待响应返回。这种立即更新客户端状态的方法称为 "乐观更新",它是 Web 应用中的常见模式。
¥For a small update like adding a reaction, we probably don't need to re-fetch the entire list of posts. Instead, we could try just updating the already-cached data on the client to match what we expect to have happen on the server. Also, if we update the cache immediately, the user gets instant feedback when they click the button instead of having to wait for the response to come back. This approach of updating client state right away is called an "optimistic update", and it's a common pattern in web apps.
RTK Query 包含用于直接更新客户端缓存的实用程序。这可以与 RTK Query 的 "请求生命周期" 方法结合使用以实现乐观更新。
¥RTK Query includes utilities to update the client-side cache directly. This can be combined with RTK Query's "request lifecycle" methods to implement optimistic updates.
缓存更新实用程序
¥Cache Update Utilities
API 切片有一些 在 api.util 下附加其他方法。这包括用于修改缓存的 thunk:upsertQueryData 用于添加或替换缓存条目,updateQueryData 用于修改缓存条目。由于这些是 thunk,它们可以在任何可以访问 dispatch 的地方使用。
¥API slices have some additional methods attached, under api.util. This includes thunks for modifying the cache: upsertQueryData to add or replace a cache entry, and updateQueryData to modify a cache entry. Since these are thunks, they can be used anywhere you have access to dispatch.
特别是,updateQueryData util thunk 需要三个参数:要更新的端点的名称、用于标识我们要更新的特定缓存条目的相同缓存键参数以及更新缓存数据的回调。updateQueryData 使用 Immer,因此你可以像在 createSlice 中一样 "mutate" 起草的缓存数据:
¥In particular, the updateQueryData util thunk takes three arguments: the name of the endpoint to update, the same cache key argument used to identify the specific cached entry we want to update, and a callback that updates the cached data. updateQueryData uses Immer, so you can "mutate" the drafted cache data the same way you would in createSlice:
dispatch(
  apiSlice.util.updateQueryData(endpointName, queryArg, draft => {
    // mutate `draft` here like you would in a reducer
    draft.value = 123
  })
)
updateQueryData 生成一个操作对象,其中包含我们所做更改的补丁差异。当我们分派该操作时,来自 dispatch 的返回值是一个 patchResult 对象。如果我们调用 patchResult.undo(),它会自动调度一个操作来反转补丁差异更改。
¥updateQueryData generates an action object with a patch diff of the changes we made. When we dispatch that action, the return value from dispatch is a patchResult object. If we call patchResult.undo(), it automatically dispatches an action that reverses the patch diff changes.
onQueryStarted 生命周期
¥The onQueryStarted Lifecycle
我们将要研究的第一个生命周期方法是 onQueryStarted。此选项可用于查询和突变。
¥The first lifecycle method we'll look at is onQueryStarted. This option is available for both queries and mutations.
如果提供,每次发出新请求时都会调用 onQueryStarted。这为我们提供了一个运行其他逻辑以响应请求的地方。
¥If provided, onQueryStarted will be called every time a new request goes out. This gives us a place to run additional logic in response to the request.
与异步 thunk 和监听器效果类似,onQueryStarted 回调从请求中接收查询 arg 值作为其第一个参数,并接收 lifecycleApi 对象作为第二个参数。lifecycleApi 包含与 createAsyncThunk 相同的 {dispatch, getState, extra, requestId} 值。它还有几个此生命周期独有的附加字段。最重要的是 lifecycleApi.queryFulfilled,这是一个 Promise,它将在请求返回时解析,并根据请求实现或拒绝。
¥Similar to async thunks and listener effects, the onQueryStarted callback receives the query arg value from the request as its first argument, and a lifecycleApi object as the second argument. lifecycleApi includes the same {dispatch, getState, extra, requestId} values as createAsyncThunk. It also has a couple additional fields that are unique to this lifecycle. The most important one is lifecycleApi.queryFulfilled, a Promise that will resolve when the request returns, and either fulfill or reject based on the request.
实现乐观更新
¥Implementing Optimistic Updates
我们可以使用 onQueryStarted 生命周期内的更新实用程序来实现 "optimistic" 更新(在请求完成之前更新缓存)或 "pessimistic" 更新(在请求完成后更新缓存)。
¥We can use the update utilities inside of the onQueryStarted lifecycle to implement either "optimistic" updates (updating the cache before the request is finished), or "pessimistic" updates (updating the cache after the request is finished).
我们可以通过在 getPosts 缓存中查找特定的 Post 条目来实现乐观更新,并对其进行 "mutating" 以增加反应计数器。对于该帖子 ID,我们可能在 getPost 缓存中还有相同概念的单个 Post 对象的第二个副本,因此如果该缓存条目也存在,我们需要更新它。
¥We can implement the optimistic update by finding the specific Post entry in the getPosts cache, and "mutating" it to increment the reaction counter. We also may have a second copy of the same conceptual individual Post object in the getPost cache for that post ID also, so we need to update that cache entry if it exists as well.
默认情况下,我们预计请求会成功。如果请求失败,我们可以 await lifecycleApi.queryFulfilled、捕获失败并撤消补丁更改以恢复乐观更新。
¥By default, we expect that the request will succeed. In case the request fails, we can await lifecycleApi.queryFulfilled, catch a failure, and undo the patch changes to revert the optimistic update.
export const apiSlice = createApi({
  reducerPath: 'api',
  baseQuery: fetchBaseQuery({ baseUrl: '/fakeApi' }),
  tagTypes: ['Post'],
  endpoints: builder => ({
    // omit other endpoints

    addReaction: builder.mutation<
      Post,
      { postId: string; reaction: ReactionName }
    >({
      query: ({ postId, reaction }) => ({
        url: `posts/${postId}/reactions`,
        method: 'POST',
        // In a real app, we'd probably need to base this on user ID somehow
        // so that a user can't do the same reaction more than once
        body: { reaction }
      }),
      // The `invalidatesTags` line has been removed,
      // since we're now doing optimistic updates
      async onQueryStarted({ postId, reaction }, lifecycleApi) {
        // `updateQueryData` requires the endpoint name and cache key arguments,
        // so it knows which piece of cache state to update
        const getPostsPatchResult = lifecycleApi.dispatch(
          apiSlice.util.updateQueryData('getPosts', undefined, draft => {
            // The `draft` is Immer-wrapped and can be "mutated" like in createSlice
            const post = draft.find(post => post.id === postId)
            if (post) {
              post.reactions[reaction]++
            }
          })
        )

        // We also have another copy of the same data in the `getPost` cache
        // entry for this post ID, so we need to update that as well
        const getPostPatchResult = lifecycleApi.dispatch(
          apiSlice.util.updateQueryData('getPost', postId, draft => {
            draft.reactions[reaction]++
          })
        )

        try {
          await lifecycleApi.queryFulfilled
        } catch {
          getPostsPatchResult.undo()
          getPostPatchResult.undo()
        }
      }
    })
  })
})
对于这种情况,我们还删除了刚刚添加的 invalidatesTags 行,因为我们不想在单击反应按钮时重新获取帖子。
¥For this case, we've also removed the invalidatesTags line we'd just added, since we don't want to refetch the posts when we click a reaction button.
现在,如果我们快速单击反应按钮几次,我们应该每次都会在 UI 中看到数字增量。如果我们查看“网络”选项卡,我们还会看到每个单独的请求也发送到服务器。
¥Now, if we click several times on a reaction button quickly, we should see the number increment in the UI each time. If we look at the Network tab, we'll also see each individual request go out to the server as well.
有时,修改请求会在服务器响应中返回有意义的数据,例如应替换临时客户端 ID 的最终项目 ID 或其他相关数据。如果我们先执行 const res = await lifecycleApi.queryFulfilled,然后我们可以使用响应中的数据将缓存更新应用为 "pessimistic" 更新。
¥Sometimes mutation requests come back with meaningful data in the server response, such as a final item ID that should replace a temporary client-side ID, or other related data. If we did the const res = await lifecycleApi.queryFulfilled first, we could then use the data from the response after that to apply cache updates as a "pessimistic" update.
通知的流式更新
¥Streaming Updates for Notifications
我们的最后一个功能是通知选项卡。当我们最初在 第 6 部分 中构建此功能时,我们说 "在真实的应用中,每次发生事情时服务器都会向我们的客户端推送更新"。我们最初通过添加 "刷新通知" 按钮来伪造该功能,并让它发出 HTTP GET 请求以获取更多通知条目。
¥Our final feature is the notifications tab. When we originally built this feature in Part 6, we said that "in a real app, the server would push updates to our client every time something happens". We initially faked that feature by adding a "Refresh Notifications" button, and having it make an HTTP GET request for more notifications entries.
应用通常会发出初始请求以从服务器获取数据,然后打开 Websocket 连接以随着时间的推移接收其他更新。RTK Query 的生命周期方法为我们提供了将这种 "流式更新" 实现到缓存数据的空间。
¥It's common for apps to make an initial request to fetch data from the server, and then open up a Websocket connection to receive additional updates over time. RTK Query's lifecycle methods give us room to implement that kind of "streaming updates" to cached data.
我们已经看到了 onQueryStarted 生命周期,它让我们实现乐观(或悲观)更新。此外,RTK Query 提供了一个 onCacheEntryAdded 端点生命周期处理程序,这是实现流式更新的好地方。我们将使用该功能来实现更现实的通知管理方法。
¥We've already seen the onQueryStarted lifecycle that let us implement optimistic (or pessimistic) updates. Additionally, RTK Query provides an onCacheEntryAdded endpoint lifecycle handler, which is a good place to implement streaming updates. We'll use that capability to implement a more realistic approach to managing notifications.
onCacheEntryAdded 生命周期
¥The onCacheEntryAdded Lifecycle
与 onQueryStarted 一样,onCacheEntryAdded 生命周期方法可用于查询和突变。
¥Like onQueryStarted, the onCacheEntryAdded lifecycle method is available for both queries and mutations.
每当有新的缓存条目(端点 + 序列化查询参数)添加到缓存时,都会调用 onCacheEntryAdded。这意味着它运行的频率将低于 onQueryStarted,后者在请求发生时运行。
¥onCacheEntryAdded will be called any time a new cache entry (endpoint + serialized query arg) is added to the cache. This means it will run less often than onQueryStarted, which runs whenever a request happens.
与 onQueryStarted 类似,onCacheEntryAdded 接收两个参数。第一个是通常的查询 args 值。第二个是略有不同的 lifecycleApi,它具有 {dispatch, getState, extra, requestId},以及 updateCachedData 实用程序,这是 api.util.updateCachedData 的替代形式,它已经知道要使用的正确端点名称和查询参数并为你执行分派。
¥Similar to onQueryStarted, onCacheEntryAdded receives two parameters. The first is the usual query args value. The second is a slightly different lifecycleApi that has {dispatch, getState, extra, requestId}, as well as an updateCachedData util, an alternate form of api.util.updateCachedData that already knows the right endpoint name and query args to use and does the dispatching for you.
还有两个可以等待的额外 Promises:
¥There's also two additional Promises that can be waited on:
-
cacheDataLoaded:使用收到的第一个缓存值解析,通常用于等待实际值在缓存中,然后再执行更多逻辑¥
cacheDataLoaded: resolves with the first cached value received, and is typically used to wait for an actual value to be in the cache before doing more logic -
cacheEntryRemoved:当此缓存条目被删除时解析(即,没有更多订阅者并且缓存条目已被垃圾收集)¥
cacheEntryRemoved: resolves when this cache entry is removed (ie, there are no more subscribers and the cache entry has been garbage-collected)
只要数据的 1+ 个订阅者仍然处于活动状态,缓存条目就会保持活动状态。当订阅者数量变为 0 并且缓存生存期计时器到期时,缓存条目将被删除,并且 cacheEntryRemoved 将解析。通常,使用模式是:
¥As long as 1+ subscribers for the data are still active, the cache entry is kept alive. When the number of subscribers goes to 0 and the cache lifetime timer expires, the cache entry will be removed, and cacheEntryRemoved will resolve. Typically, the usage pattern is:
-
立即
await cacheDataLoaded¥
await cacheDataLoadedright away -
创建像 Websocket 一样的服务器端数据订阅
¥Create a server-side data subscription like a Websocket
-
当收到更新时,根据更新使用
updateCachedData到 "mutate" 的缓存值¥When an update is received, use
updateCachedDatato "mutate" the cached values based on the update -
最后是
await cacheEntryRemoved¥
await cacheEntryRemovedat the end -
之后清理订阅
¥Clean up subscriptions afterwards
这使得 onCacheEntryAdded 成为放置长期运行逻辑的好地方,只要 UI 需要此特定数据,该逻辑就应该继续运行。一个很好的例子可能是聊天应用需要获取聊天通道的初始消息,使用 Websocket 订阅随时间接收其他消息,并在用户关闭通道时断开 Websocket 连接。
¥This makes onCacheEntryAdded a good place to put longer-running logic that should keep going as long as the UI needs this particular piece of data. A good example might be a chat app that needs to fetch initial messages for a chat channel, uses a Websocket subscription to receive additional messages over time, and disconnects the Websocket when the user closes the channel.
获取通知
¥Fetching Notifications
我们需要将这项工作分为几个步骤。
¥We'll need to break this work into a few steps.
首先,我们将设置一个新的通知端点,并添加 fetchNotificationsWebsocket thunk 的替代品,它将触发我们的模拟后端通过 websocket 而不是 HTTP 请求发回通知。
¥First, we'll set up a new endpoint for notifications, and add a replacement for the fetchNotificationsWebsocket thunk that will trigger our mock backend to send back notifications via a websocket instead of as an HTTP request.
我们将像对 getUsers 所做的那样,在 notificationsSlice 中注入 getNotifications 端点,只是为了表明这是可能的。
¥We'll inject the getNotifications endpoint in notificationsSlice like we did with getUsers, just to show it's possible.
import { createEntityAdapter, createSlice } from '@reduxjs/toolkit'

import { client } from '@/api/client'
import { forceGenerateNotifications } from '@/api/server'

import type { AppThunk, RootState } from '@/app/store'
import { createAppAsyncThunk } from '@/app/withTypes'

import { apiSlice } from '@/features/api/apiSlice'

// omit types and `fetchNotifications` thunk

export const apiSliceWithNotifications = apiSlice.injectEndpoints({
  endpoints: builder => ({
    getNotifications: builder.query<ServerNotification[], void>({
      query: () => '/notifications'
    })
  })
})

export const { useGetNotificationsQuery } = apiSliceWithNotifications
getNotifications 是一个标准查询端点,它将存储我们从服务器收到的 ServerNotification 对象。
¥getNotifications is a standard query endpoint that will store the ServerNotification objects we received from the server.
然后,在 <Navbar> 中,我们可以使用新的查询钩子自动获取一些通知。当我们这样做时,我们只会返回 ServerNotification 对象,而不是带有我们添加的额外 {read, isNew} 字段的 ClientNotification 对象,因此我们必须暂时禁用对 notification.new 的检查:
¥Then, in <Navbar>, we can use the new query hook to automatically fetch some notifications. When we do that, we're only getting back ServerNotification objects, not the ClientNotification objects with the additional {read, isNew} fields we've been adding, so we'll have to temporarily disable the check for notification.new:
// omit other imports

import { allNotificationsRead, useGetNotificationsQuery } from './notificationsSlice'

export const NotificationsList = () => {
  const dispatch = useAppDispatch()
  const { data: notifications = [] } = useGetNotificationsQuery()

  useLayoutEffect(() => {
    dispatch(allNotificationsRead())
  })

  const renderedNotifications = notifications.map((notification) => {
    const notificationClassname = classnames('notification', {
      // new: notification.isNew,
    })
  }

  // omit rendering
}
如果我们进入 "通知" 选项卡,我们应该会看到一些条目出现,但它们都不会被着色以表明它们是新的。同时,如果我们单击 "刷新通知" 按钮,我们将看到 "未读通知" 计数器不断增加。这是因为两件事。按钮仍会触发将条目存储在 state.notifications 切片中的原始 fetchNotifications thunk。此外,<NotificationsList> 组件甚至没有重新渲染(它依赖于来自 useGetNotificationsQuery 钩子的缓存数据,而不是 state.notifications 切片),因此 useLayoutEffect 没有运行或分派 allNotificationsRead。
¥If we go into the "Notifications" tab, we should see a few entries show up, but none of them will be colored to indicate they're new. Meanwhile, if we click the "Refresh Notifications" button, we'll see the "unread notifications" counter keep increasing. That's because of two things. The button is still triggering the original fetchNotifications thunk that stores entries in the state.notifications slice. Also, the <NotificationsList> component isn't even re-rendering (it relies on the cached data from the useGetNotificationsQuery hook, not the state.notifications slice), and so the useLayoutEffect isn't running or dispatching allNotificationsRead.
跟踪客户端状态
¥Tracking Client-Side State
下一步是重新考虑我们如何跟踪 "read" 通知状态。
¥The next step is to rethink how we track "read" status for notifications.
以前,我们获取从 fetchNotifications thunk 中获取的 ServerNotification 对象,在 Reducer 中添加 {read, isNew} 字段,然后保存这些对象。现在,我们将 ServerNotification 对象保存在 RTK 查询缓存中。
¥Previously, we were taking the ServerNotification objects we fetched from the fetchNotifications thunk, adding the {read, isNew} fields in the reducer, and saving those objects. Now, we're saving the ServerNotification objects in the RTK Query cache.
我们可以做更多手动缓存更新。我们可以使用 transformResponse 添加其他字段,然后在用户查看通知时进行一些工作来修改缓存本身。
¥We could do more manual cache updates. We could use transformResponse to add the additional fields, then do some work to modify the cache itself as the user views the notifications.
相反,我们将尝试我们已经在做的事情的不同形式:跟踪 notificationsSlice 内部的读取状态。
¥Instead, we're going to try a different form of what we were already doing: keeping track of the read status inside of the notificationsSlice.
从概念上讲,我们真正想要做的是跟踪每个通知项的 {read, isNew} 状态。如果我们有办法知道查询钩子何时获取通知并可以访问通知 ID,我们可以在切片中执行此操作并为收到的每个通知保留相应的 "metadata" 条目。
¥Conceptually, what we really want to do is track the {read, isNew} status of each notification item. We could do that in the slice and keep a corresponding "metadata" entry for each notification we've received, if we had a way to know when the query hook has fetched notifications and had access to the notification IDs.
幸运的是,我们可以做到这一点!由于 RTK Query 是基于标准 Redux Toolkit 片段(如 createAsyncThunk)构建的,因此每次请求完成时,它都会调度带有结果的 fulfilled 操作。我们只需要一种方法来在 notificationsSlice 中监听它,我们知道 createSlice.extraReducers 是我们需要处理该操作的地方。
¥Fortunately, we can do that! Because RTK Query is built out of standard Redux Toolkit pieces like createAsyncThunk, it's dispatching a fulfilled action with the results each time a request finishes. We just need a way to listen to that in the notificationsSlice, and we know that createSlice.extraReducers is where we'd need to handle that action.
但我们在听什么?因为这是一个 RTKQ 端点,我们无法访问 asyncThunk.fulfilled/pending 动作创建者,所以我们不能直接将它们传递给 builder.addCase()。
¥But what are we listening for? Because this is an RTKQ endpoint, we don't have access to the asyncThunk.fulfilled/pending action creators, so we can't just pass those to builder.addCase().
RTK Query 端点公开一个 matchFulfilled 匹配器函数,我们可以在 extraReducers 内部使用它来监听该端点的 fulfilled 操作。(请注意,我们需要从 builder.addCase() 更改为 builder.addMatcher())。
¥RTK Query endpoints expose a matchFulfilled matcher function, which we can use inside of extraReducers to listen to the fulfilled actions for that endpoint. (Note that we need to change from builder.addCase() to builder.addMatcher()).
因此,我们将把 ClientNotification 更改为新的 NotificationMetadata 类型,监听 getNotifications 查询操作,并将 "仅元数据" 对象存储在切片中,而不是整个通知中。
¥So, we're going to change ClientNotification to be a new NotificationMetadata type, listen for the getNotifications query actions, and store the "just metadata" objects in the slice instead of the entire notifications.
作为其中的一部分,我们将把 notificationsAdapter 重命名为 metadataAdapter,并将所有提及的 notification 变量替换为 metadata,以便更清晰。这看起来可能有很多变化,但它主要只是重命名变量。
¥As part of that, we're going to rename notificationsAdapter to metadataAdapter, and replace all mentions of notification variables with metadata for clarity. This may look like a lot of changes, but it's mostly just renaming variables.
我们还将实体适配器 selectEntities 选择器导出为 selectMetadataEntities。我们需要在 UI 中通过 ID 查找这些元数据对象,如果组件中有可用的查找表,那么查找起来会更容易。
¥We'll also export the entity adapter selectEntities selector as selectMetadataEntities. We're going to need to look up these metadata objects by ID in the UI, and it will be easier to do that if we have the lookup table available in the component.
// omit imports and thunks

// Replaces `ClientNotification`, since we just need these fields
export interface NotificationMetadata {
  // Add an `id` field, since this is now a standalone object
  id: string
  read: boolean
  isNew: boolean
}

export const fetchNotifications = createAppAsyncThunk(
  'notifications/fetchNotifications',
  async (_unused, thunkApi) => {
    // Deleted timestamp lookups - we're about to remove this thunk anyway
    const response = await client.get<ServerNotification[]>(
      `/fakeApi/notifications`
    )
    return response.data
  }
)

// Renamed from `notificationsAdapter`, and we don't need sorting
const metadataAdapter = createEntityAdapter<NotificationMetadata>()

const initialState = metadataAdapter.getInitialState()

const notificationsSlice = createSlice({
  name: 'notifications',
  initialState,
  reducers: {
    allNotificationsRead(state) {
      // Rename to `metadata`
      Object.values(state.entities).forEach(metadata => {
        metadata.read = true
      })
    }
  },
  extraReducers(builder) {
    // Listen for the endpoint `matchFulfilled` action with `addMatcher`
    builder.addMatcher(
      apiSliceWithNotifications.endpoints.getNotifications.matchFulfilled,
      (state, action) => {
        // Add client-side metadata for tracking new notifications
        const notificationsMetadata: NotificationMetadata[] =
          action.payload.map(notification => ({
            // Give the metadata object the same ID as the notification
            id: notification.id,
            read: false,
            isNew: true
          }))

        // Rename to `metadata`
        Object.values(state.entities).forEach(metadata => {
          // Any notifications we've read are no longer new
          metadata.isNew = !metadata.read
        })

        metadataAdapter.upsertMany(state, notificationsMetadata)
      }
    )
  }
})

export const { allNotificationsRead } = notificationsSlice.actions

export default notificationsSlice.reducer

// Rename the selector
export const {
  selectAll: selectAllNotificationsMetadata,
  selectEntities: selectMetadataEntities
} = metadataAdapter.getSelectors(
  (state: RootState) => state.notifications
)

export const selectUnreadNotificationsCount = (state: RootState) => {
  const allMetadata = selectAllNotificationsMetadata(state)
  const unreadNotifications = allMetadata.filter(metadata => !metadata.read)
  return unreadNotifications.length
}
然后我们可以将元数据查找表读入 <NotificationsList>,并为我们正在渲染的每个通知查找正确的元数据对象,然后重新启用 isNew 检查以显示正确的样式:
¥Then we can read that metadata lookup table into <NotificationsList>, and look up the right metadata object for each notification that we're rendering, and re-enable the isNew check to show the right styling:
import { allNotificationsRead, useGetNotificationsQuery, selectMetadataEntities } from './notificationsSlice'

export const NotificationsList = () => {
  const dispatch = useAppDispatch()
  const { data: notifications = [] } = useGetNotificationsQuery()
  const notificationsMetadata = useAppSelector(selectMetadataEntities)

  useLayoutEffect(() => {
    dispatch(allNotificationsRead())
  })

  const renderedNotifications = notifications.map((notification) => {

      // Get the metadata object matching this notification
    const metadata = notificationsMetadata[notification.id]
    const notificationClassname = classnames('notification', {
      // re-enable the `isNew` check for styling
      new: metadata.isNew,
    })

    // omit rendering
  }
}
现在如果我们查看 "通知" 选项卡,新通知的样式是正确的……但我们仍然没有收到任何通知,也没有将这些通知标记为已读。
¥Now if we look at the "Notifications" tab, the new notifications are styled correctly... but we still don't get any more notifications, nor do these get marked as read.
通过 Websocket 推送通知
¥Pushing Notifications Via Websocket
我们还有几个步骤要做才能完成切换到通过服务器推送获取更多通知。
¥We've got a couple more steps to do to finish switching over to getting more notifications via server push.
下一步是将我们的 "刷新通知" 按钮从调度异步 thunk 切换到通过 HTTP 请求获取,强制模拟后端通过 websocket 发送通知。
¥The next step is to switch our "Refresh Notifications" button from dispatching an async thunk to fetch via HTTP request, to forcing the mock backend to send notifications via a websocket.
我们的 src/api/server.ts 文件已经配置了一个模拟 Websocket 服务器,类似于模拟 HTTP 服务器。由于我们没有真正的后端(或其他用户!),我们仍然需要手动告诉模拟服务器何时发送新通知,因此我们将继续伪造它,方法是单击一个按钮以强制更新。为此,server.ts 导出一个名为 forceGenerateNotifications 的函数,它将强制后端通过该 websocket 推出一些通知条目。
¥Our src/api/server.ts file has a mock Websocket server already configured, similar to the mock HTTP server. Since we don't have a real backend (or other users!), we still need to manually tell the mock server when to send new notifications, so we'll continue faking that by having a button we click to force the update. To do this, server.ts exports a function called forceGenerateNotifications, which will force the backend to push out some notification entries via that websocket.
我们将用 fetchNotificationsWebsocket thunk 替换 fetchNotifications 异步 thunk。fetchNotificationsWebsocket 正在执行与现有 fetchNotifications 异步 thunk 相同的工作。但是,在这种情况下,我们并没有发出实际的 HTTP 请求,因此没有 await 调用,也没有要返回的有效负载。我们只是调用 server.ts 专门导出的函数来伪造服务器端推送通知。
¥We're going to replace the fetchNotifications async thunk with a fetchNotificationsWebsocket thunk. fetchNotificationsWebsocket is doing the same kind of work as the existing fetchNotifications async thunk. However, in this case we're not making an actual HTTP request, so there's no await call and no payload to return. We're just calling a function that server.ts exported specifically to let us fake server-side push notifications.
因此,fetchNotificationsWebsocket 甚至不需要使用 createAsyncThunk。它只是一个普通的手写 thunk,因此我们可以使用 AppThunk 类型来描述 thunk 函数的类型,并为 (dispatch, getState) 提供正确的类型。
¥Because of that, fetchNotificationsWebsocket doesn't even need to use createAsyncThunk. It's just a normal handwritten thunk, so we can use the AppThunk type to describe the type of the thunk function and have correct types for (dispatch, getState).
为了实现 "最新时间戳" 检查,我们确实需要添加选择器,以便我们也可以从通知缓存条目中读取。我们将使用与用户切片相同的模式。
¥In order to implement the "latest timestamp" check, we do need to add selectors that let us read from the notifications cache entry as well. We'll use the same pattern we saw with the users slice.
import {
  createEntityAdapter,
  createSlice,
  createSelector
} from '@reduxjs/toolkit'

import { forceGenerateNotifications } from '@/api/server'
import type { AppThunk, RootState } from '@/app/store'

import { apiSlice } from '@/features/api/apiSlice'

// omit types and API slice setup

export const { useGetNotificationsQuery } = apiSliceWithNotifications

export const fetchNotificationsWebsocket =
  (): AppThunk => (dispatch, getState) => {
    const allNotifications = selectNotificationsData(getState())
    const [latestNotification] = allNotifications
    const latestTimestamp = latestNotification?.date ?? ''
    // Hardcode a call to the mock server to simulate a server push scenario over websockets
    forceGenerateNotifications(latestTimestamp)
  }

const emptyNotifications: ServerNotification[] = []

export const selectNotificationsResult =
  apiSliceWithNotifications.endpoints.getNotifications.select()

const selectNotificationsData = createSelector(
  selectNotificationsResult,
  notificationsResult => notificationsResult.data ?? emptyNotifications
)

// omit slice and selectors
然后我们可以交换 <Navbar> 以分派 fetchNotificationsWebsocket:
¥Then we can swap <Navbar> to dispatch fetchNotificationsWebsocket instead:
import {
  fetchNotificationsWebsocket,
  selectUnreadNotificationsCount,
} from '@/features/notifications/notificationsSlice'
import { selectCurrentUser } from '@/features/users/usersSlice'

import { UserIcon } from './UserIcon'

export const Navbar = () => {
  // omit hooks

  if (isLoggedIn) {
    const onLogoutClicked = () => {
      dispatch(logout())
    }

    const fetchNewNotifications = () => {
      dispatch(fetchNotificationsWebsocket())
    }
快到了!我们正在通过 RTK 查询获取初始通知,在客户端跟踪读取状态,并且我们已经设置了基础架构以强制通过 websocket 发送新通知。但是,如果我们现在单击 "刷新通知",它将引发错误 - 我们还没有实现 websocket 处理!
¥Almost there! We're fetching initial notifications via RTK Query, tracking read status on the client side, and we've got the infrastructure set up to force new notifications via a websocket. But, if we click "Refresh Notifications" now, it will throw an error - we don't have the websocket handling implemented yet!
因此,让我们实现实际的流式更新逻辑。
¥So, let's implement the actual streaming updates logic.
实现流式更新
¥Implementing Streaming Updates
对于此应用,从概念上讲,我们希望在用户登录后立即检查通知,并立即开始监听所有未来传入的通知更新。如果用户注销,我们应该停止监听。
¥For this app, conceptually we want to check for notifications as soon as the user logs in, and immediately start listening for all future incoming notifications updates. If the user logs out, we should stop listening.
我们知道 <Navbar> 仅在用户登录后渲染,并且它会一直渲染。因此,这将是保持缓存订阅有效的好地方。我们可以通过在该组件中渲染 useGetNotificationsQuery() 钩子来做到这一点。
¥We know that the <Navbar> is only rendered after the user logs in, and it stays rendered the whole time. So, that would be a good place to keep the cache subscription alive. We can do that by rendering the useGetNotificationsQuery() hook in that component.
// omit other imports
import {
  fetchNotificationsWebsocket,
  selectUnreadNotificationsCount,
  useGetNotificationsQuery
} from '@/features/notifications/notificationsSlice'

export const Navbar = () => {
  const dispatch = useAppDispatch()
  const user = useAppSelector(selectCurrentUser)

  // Trigger initial fetch of notifications and keep the websocket open to receive updates
  useGetNotificationsQuery()

  // omit rest of the component
}
最后一步是将 onCacheEntryAdded 生命周期处理程序实际添加到我们的 getNotifications 端点,并添加使用 websocket 的逻辑。
¥The last step is to actually add the onCacheEntryAdded lifecycle handler to our getNotifications endpoint, and add the logic for working with the websocket.
在这种情况下,我们将创建一个新的 websocket,订阅来自套接字的传入消息,从这些消息中读取通知,并使用附加数据更新 RTKQ 缓存条目。这在概念上类似于我们在 onQueryStarted 中对乐观更新所做的操作。
¥In this case, we're going to create a new websocket, subscribe to incoming messages from the socket, read the notifications from those messages, and update the RTKQ cache entry with the additional data. This is similar conceptually to what we did with the optimistic updates in onQueryStarted.
我们在这里会遇到另一个问题。如果我们通过 websocket 接收传入通知,则没有显式 "请求成功" 操作被分派,但我们仍然需要为所有传入通知创建新的通知元数据条目。
¥There's one other issue we'll run into here. If we're receiving incoming notifications via websocket, there isn't an explicit "request succeeded" action being dispatched, yet we still need to create new notification metadata entries for all of the incoming notifications.
我们将通过创建一个特定的新 Redux 操作类型来解决这个问题,该操作类型将仅用于发出 "我们收到了更多通知" 信号,并从 websocket 处理程序中分派它。然后我们可以使用 isAnyOf 匹配器实用程序更新 notificationsSlice 以监听端点操作和此其他操作,并在两种情况下执行相同的元数据逻辑。
¥We'll address this by creating a specific new Redux action type that will be used just to signal that "we've received more notifications", and dispatch that from within the websocket handler. Then we can update the notificationsSlice to listen for both the endpoint action and this other action using the isAnyOf matcher utility, and do the same metadata logic in both cases.
import {
  createEntityAdapter,
  createSlice,
  createSelector,
  createAction,
  isAnyOf
} from '@reduxjs/toolkit'
// omit imports and other code

const notificationsReceived = createAction<ServerNotification[]>('notifications/notificationsReceived')

export const apiSliceWithNotifications = apiSlice.injectEndpoints({
  endpoints: builder => ({
    getNotifications: builder.query<ServerNotification[], void>({
      query: () => '/notifications',
      async onCacheEntryAdded(arg, lifecycleApi) {
        // create a websocket connection when the cache subscription starts
        const ws = new WebSocket('ws://localhost')
        try {
          // wait for the initial query to resolve before proceeding
          await lifecycleApi.cacheDataLoaded

          // when data is received from the socket connection to the server,
          // update our query result with the received message
          const listener = (event: MessageEvent<string>) => {
            const message: {
              type: 'notifications'
              payload: ServerNotification[]
            } = JSON.parse(event.data)
            switch (message.type) {
              case 'notifications': {
                lifecycleApi.updateCachedData(draft => {
                  // Insert all received notifications from the websocket
                  // into the existing RTKQ cache array
                  draft.push(...message.payload)
                  draft.sort((a, b) => b.date.localeCompare(a.date))
                })

                // Dispatch an additional action so we can track "read" state
                lifecycleApi.dispatch(notificationsReceived(message.payload))
                break
              }
              default:
                break
            }
          }

          ws.addEventListener('message', listener)
        } catch {
          // no-op in case `cacheEntryRemoved` resolves before `cacheDataLoaded`,
          // in which case `cacheDataLoaded` will throw
        }
        // cacheEntryRemoved will resolve when the cache subscription is no longer active
        await lifecycleApi.cacheEntryRemoved
        // perform cleanup steps once the `cacheEntryRemoved` promise resolves
        ws.close()
      }
    })
  })
})

export const { useGetNotificationsQuery } = apiSliceWithNotifications

const matchNotificationsReceived = isAnyOf(
  notificationsReceived,
  apiSliceWithNotifications.endpoints.getNotifications.matchFulfilled,
)

// omit other code

const notificationsSlice = createSlice({
  name: 'notifications',
  initialState,
  reducers: { /* omit reducers */  },
  extraReducers(builder) {
    builder.addMatcher(matchNotificationsReceived, (state, action) => {
     // omit logic
    }
  },
})
添加缓存条目后,我们将创建一个新的 WebSocket 实例,该实例将连接到模拟服务器后端。
¥When the cache entry is added, we create a new WebSocket instance that will connect to the mock server backend.
我们等待 lifecycleApi.cacheDataLoaded Promise 解析,此时我们知道请求已完成并且我们有实际可用的数据。
¥We wait for the lifecycleApi.cacheDataLoaded Promise to resolve, at which point we know that the request has completed and we have actual data available.
我们需要订阅来自 websocket 的传入消息。我们的回调将收到一个 websocket MessageEvent,我们知道 event.data 将是一个包含来自后端的 JSON 序列化通知数据的字符串。
¥We need to subscribe to incoming messages from the websocket. Our callback will receive a websocket MessageEvent, and we know that event.data will be a string containing the JSON-serialized notifications data from the backend.
当我们收到该消息时,我们会解析内容,并确认解析的对象与我们正在寻找的消息类型匹配。如果是这样,我们调用 lifecycleApi.updateCachedData(),将所有新通知添加到现有缓存条目,并重新排序以确保它们的顺序正确。
¥When we receive that message, we parse the contents, and confirm that the parsed object matches the message type that we're looking for. If so, we call lifecycleApi.updateCachedData(), add all the new notifications to the existing cache entry, and re-sort it to make sure they're in the correct order.
最后,我们还可以等待 lifecycleApi.cacheEntryRemoved promise 来知道何时需要关闭 websocket 并进行清理。
¥Finally, we can also wait for the lifecycleApi.cacheEntryRemoved promise to know when we need to close the websocket and clean up.
请注意,我们不需要在此处的生命周期方法中创建 websocket。根据应用结构,你可能在应用设置过程中较早创建了它,它可能位于另一个模块文件中或其自己的 Redux 中间件中。这里真正重要的是,我们使用 onCacheEntryAdded 生命周期来了解何时开始监听传入数据、将结果插入缓存条目以及在缓存条目消失时进行清理。
¥Note that it's not required that we create the websocket here in the lifecycle method. Depending on the app structure, you might have created it earlier in the app setup process, and it might be living in another module file or in its own Redux middleware. What actually matters here is that we're using the onCacheEntryAdded lifecycle to know when to start listening for incoming data, inserting the results into the cache entry, and cleaning up when the cache entry goes away.
就是这样!现在,当我们单击 "刷新通知" 时,我们应该看到未读通知数量增加,单击 "通知" 选项卡应该会适当地高亮已读和未读通知。
¥And that's it! Now when we click "Refresh Notifications", we should see the unread notifications count increase, and clicking over to the "Notifications" tab should highlight read and unread notifications appropriately.
清理
¥Cleanup
最后一步,我们可以进行一些额外的清理。postsSlice.ts 中的实际 createSlice 调用不再使用,因此我们可以删除切片对象及其关联的选择器 + 类型,然后从 Redux 存储中删除 postsReducer。我们将保留 addPostsListeners 函数和类型,因为那是该代码的合理位置。
¥As a final step, we can do some additional cleanup. The actual createSlice call in postsSlice.ts is no longer being used, so we can delete the slice object and its associated selectors + types, then remove postsReducer from the Redux store. We'll leave the addPostsListeners function and the types there, since that's a reasonable place for that code.
你学到了什么
¥What You've Learned
这样,我们就完成了将应用转换为使用 RTK 查询!所有数据获取均已切换为使用 RTKQ,并且我们通过添加乐观更新和流式更新来改善用户体验。
¥With that, we've finished converting our application over to use RTK Query! All of the data fetching has been switched over to use RTKQ, and we've improved the user experience by adding optimistic updates and streaming updates.
正如我们所看到的,RTK 查询包含一些强大的选项,用于控制我们管理缓存数据的方式。虽然你可能不会立即需要所有这些选项,但它们提供了灵活性和关键功能来帮助实现特定的应用行为。
¥As we've seen, RTK Query includes some powerful options for controlling how we manage cached data. While you may not need all of these options right away, they provide flexibility and key capabilities to help implement specific application behaviors.
让我们最后看一下整个应用的运行情况:
¥Let's take one last look at the whole application in action:
-
特定的缓存标签可用于更细粒度的缓存失效
¥Specific cache tags can be used for finer-grained cache invalidation
-
缓存标签可以是
'Post'或{type: 'Post', id}¥Cache tags can be either
'Post'or{type: 'Post', id} -
端点可以根据结果和参数缓存键提供或无效缓存标签
¥Endpoints can provide or invalidate cache tags based on results and arg cache keys
-
-
RTK Query 的 API 与 UI 无关,可以在 React 之外使用
¥RTK Query's APIs are UI-agnostic and can be used outside of React
-
端点对象包括发起请求、生成结果选择器、匹配请求动作对象的功能
¥Endpoint objects include functions for initiating requests, generating result selectors, and matching request action objects
-
-
响应可以根据需要以不同的方式进行转换
¥Responses can be transformed in different ways as needed
-
端点可以定义
transformResponse回调来在缓存之前修改数据¥Endpoints can define a
transformResponsecallback to modify the data before caching -
可以为 Hooks 提供
selectFromResult选项来提取/转换数据¥Hooks can be given a
selectFromResultoption to extract/transform data -
组件可以读取整个值并使用
useMemo进行转换¥Components can read an entire value and transform with
useMemo
-
-
RTK 查询具有用于操作缓存数据的高级选项,以获得更好的用户体验
¥RTK Query has advanced options for manipulating cached data for better user experience
-
onQueryStarted生命周期可用于乐观更新,方法是在请求返回之前立即更新缓存¥The
onQueryStartedlifecycle can be used for optimistic updates by updating cache immediately before a request returns -
onCacheEntryAdded生命周期可用于通过基于服务器推送连接随时间更新缓存来进行流式更新¥The
onCacheEntryAddedlifecycle can be used for streaming updates by updating cache over time based on server push connections -
RTKQ 端点有一个
matchFulfilled匹配器,可以在内部使用它来监听 RTKQ 端点操作并运行其他逻辑,例如更新切片的状态¥RTKQ endpoints have a
matchFulfilledmatcher that can be used inside to listen for RTKQ endpoint actions and run additional logic, like updating a slice's state
-
下一步是什么?
¥What's Next?
恭喜,你已完成 Redux Essentials 教程!现在,你应该对 Redux Toolkit 和 React-Redux 是什么、如何编写和组织 Redux 逻辑、Redux 数据流和 React 用法,以及如何使用 configureStore 和 createSlice 等 API 有了充分的了解。你还应该知道 RTK Query 如何简化获取和使用缓存数据的过程。
¥Congratulations, you've completed the Redux Essentials tutorial! You should now have a solid understanding of what Redux Toolkit and React-Redux are, how to write and organize Redux logic, Redux data flow and usage with React, and how to use APIs like configureStore and createSlice. You should also know how RTK Query can simplify the process of fetching and using cached data.
有关使用 RTK 查询的更多详细信息,请参阅 RTK 查询使用指南文档 和 API 参考。
¥For more details on using RTK Query, see the RTK Query usage guide docs and API reference.
到目前为止,我们在本教程中介绍的概念应该足以让你开始使用 React 和 Redux 构建自己的应用。现在是尝试自己开展项目以巩固这些概念并了解它们在实践中如何发挥作用的好时机。如果你不确定要构建什么样的项目,请参阅 这个应用项目创意列表 以获得一些灵感。
¥The concepts we've covered in this tutorial so far should be enough to get you started building your own applications using React and Redux. Now's a great time to try working on a project yourself to solidify these concepts and see how they work in practice. If you're not sure what kind of a project to build, see this list of app project ideas for some inspiration.
Redux Essentials 教程重点关注 "如何正确使用 Redux",而不是 "怎么运行的" 或 "为什么会这样"。特别是,Redux Toolkit 是一组更高级别的抽象和实用程序,它有助于了解 RTK 中的抽象实际上为你做什么。通读 "Redux 基础知识" 教程 将帮助你了解如何编写 Redux 代码 "用手",以及为什么我们推荐 Redux Toolkit 作为编写 Redux 逻辑的默认方式。
¥The Redux Essentials tutorial is focused on "how to use Redux correctly", rather than "how it works" or "why it works this way". In particular, Redux Toolkit is a higher-level set of abstractions and utilities, and it's helpful to understand what the abstractions in RTK are actually doing for you. Reading through the "Redux Fundamentals" tutorial will help you understand how to write Redux code "by hand", and why we recommend Redux Toolkit as the default way to write Redux logic.
使用 Redux 部分提供了有关许多重要概念的信息,例如 如何构造你的 reducer,而 我们的风格指南页面 部分提供了有关我们推荐的模式和最佳实践的重要信息。
¥The Using Redux section has information on a number of important concepts, like how to structure your reducers, and our Style Guide page has important information on our recommended patterns and best practices.
如果你想更多地了解 Redux 存在的原因、它试图解决哪些问题以及如何使用它,请参阅 Redux 维护者 Mark Erikson 在 Redux 之道,第 1 部分:实现和意图 和 Redux 之道,第 2 部分:实践与理念 上的帖子。
¥If you'd like to know more about why Redux exists, what problems it tries to solve, and how it's meant to be used, see Redux maintainer Mark Erikson's posts on The Tao of Redux, Part 1: Implementation and Intent and The Tao of Redux, Part 2: Practice and Philosophy.
如果你正在寻求有关 Redux 问题的帮助,请加入 Discord 上 Reactiflux 服务器中的 #redux 通道。
¥If you're looking for help with Redux questions, come join the #redux channel in the Reactiflux server on Discord.
感谢你阅读本教程,我们希望你喜欢使用 Redux 构建应用!
¥Thanks for reading through this tutorial, and we hope you enjoy building applications with Redux!