Redux 基础知识,第 7 部分:标准 Redux 模式
-
现实 Redux 应用中使用的标准模式,以及这些模式存在的原因:
¥Standard patterns used in real-world Redux apps, and why those patterns exist:
-
用于封装动作对象的动作创建器
¥Action creators for encapsulating action objects
-
用于提高性能的记忆选择器
¥Memoized selectors for improving performance
-
通过加载枚举跟踪请求状态
¥Tracking request status via loading enums
-
用于管理项目集合的规范化状态
¥Normalizing state for managing collections of items
-
使用 Promise 和 thunk 进行工作
¥Working with promises and thunks
-
-
了解前面所有部分中的主题
¥Understanding the topics in all previous sections
在 第 6 部分:异步逻辑和数据获取 中,我们了解了如何使用 Redux 中间件来编写可以与存储对话的异步逻辑。特别是,我们使用 Redux "thunk" 中间件来编写可以包含可重用异步逻辑的函数,而无需提前知道它们将与哪个 Redux 存储进行通信。
¥In Part 6: Async Logic and Data Fetching, we saw how to use Redux middleware to write async logic that can talk to the store. In particular, we used the Redux "thunk" middleware to write functions that can contain reusable async logic, without knowing what Redux store they'll be talking to ahead of time.
到目前为止,我们已经介绍了 Redux 实际工作原理的基础知识。然而,现实世界的 Redux 应用在这些基础知识之上还使用一些额外的模式。
¥So far, we've covered the basics of how Redux actually works. However, real world Redux applications use some additional patterns on top of those basics.
需要注意的是,使用 Redux 不需要这些模式!但是,这些模式的存在都有很好的理由,并且你会在几乎每个 Redux 代码库中看到其中的部分或全部。
¥It's important to note that none of these patterns are required to use Redux! But, there are very good reasons why each of these patterns exists, and you'll see some or all of them in almost every Redux codebase.
在本节中,我们将重写现有的待办事项应用代码以使用其中一些模式,并讨论为什么它们在 Redux 应用中常用。然后,在 第 8 部分 中,我们将讨论 "现代回归",包括如何使用我们官方的 Redux 工具包 包来简化我们在应用中编写 "用手" 的所有 Redux 逻辑,以及为什么我们建议使用 Redux Toolkit 作为编写 Redux 应用的标准方法 。
¥In this section, we'll rework our existing todo app code to use some of these patterns, and talk about why they're commonly used in Redux apps. Then, in Part 8, we'll talk about "modern Redux", including how to use our official Redux Toolkit package to simplify all the Redux logic we've written "by hand" in our app, and why we recommend using Redux Toolkit as the standard approach for writing Redux apps.
请注意,本教程有意展示旧式 Redux 逻辑模式,这些模式比我们使用 Redux Toolkit 教授的 "现代回归" 模式需要更多的代码,作为当今使用 Redux 构建应用的正确方法,以便解释 Redux 背后的原理和概念。它并不意味着是一个生产就绪的项目。
¥Note that this tutorial intentionally shows older-style Redux logic patterns that require more code than the "modern Redux" patterns with Redux Toolkit we teach as the right approach for building apps with Redux today, in order to explain the principles and concepts behind Redux. It's not meant to be a production-ready project.
请参阅以下页面以了解如何将 "现代回归" 与 Redux Toolkit 结合使用:
¥See these pages to learn how to use "modern Redux" with Redux Toolkit:
-
完整的 "Redux 要点" 教程,它使用 Redux Toolkit 教授 "如何正确使用 Redux" 实际应用。我们建议所有 Redux 学习者都应该阅读 "必需品" 教程!
¥The full "Redux Essentials" tutorial, which teaches "how to use Redux, the right way" with Redux Toolkit for real-world apps. We recommend that all Redux learners should read the "Essentials" tutorial!
-
Redux 基础知识,第 8 部分:使用 Redux 工具包的现代 Redux,展示了如何将前面部分的底层示例转换为现代 Redux Toolkit 等效项
¥Redux Fundamentals, Part 8: Modern Redux with Redux Toolkit, which shows how to convert the low-level examples from earlier sections into modern Redux Toolkit equivalents
动作创作者
¥Action Creators
在我们的应用中,我们直接在代码中编写操作对象,并在代码中调度它们:
¥In our app, we've been writing action objects directly in the code, where they're being dispatched:
dispatch({ type: 'todos/todoAdded', payload: trimmedText })
然而,在实践中,编写良好的 Redux 应用在我们分派这些操作对象时实际上并不会内联写入这些操作对象。相反,我们使用 "动作创造者" 函数。
¥However, in practice, well-written Redux apps don't actually write those action objects inline when we dispatch them. Instead, we use "action creator" functions.
动作创建者是一个创建并返回动作对象的函数。我们通常使用它们,这样我们就不必每次都手动编写操作对象:
¥An action creator is a function that creates and returns an action object. We typically use these so we don't have to write the action object by hand every time:
const todoAdded = text => {
  return {
    type: 'todos/todoAdded',
    payload: text
  }
}
然后,我们通过调用动作创建者来使用它们,然后将生成的动作对象直接传递给 dispatch:
¥We then use them by calling the action creator, and then passing the resulting action object directly to dispatch:
store.dispatch(todoAdded('Buy milk'))

console.log(store.getState().todos)
// [ {id: 0, text: 'Buy milk', completed: false}]
Detailed Explanation: Why use Action Creators?
在我们的小示例待办事项应用中,每次手动编写操作对象并不太困难。事实上,通过改用动作创建器,我们增加了更多工作 - 现在我们必须编写一个函数和操作对象。
¥In our small example todo app, writing action objects by hand every time isn't too difficult. In fact, by switching to using action creators, we've added more work - now we have to write a function and the action object.
但是,如果我们需要从应用的许多部分分派相同的操作怎么办?或者,如果每次分派操作时都必须执行一些额外的逻辑(例如创建唯一 ID)怎么办?每次我们需要分派该操作时,我们最终都必须复制粘贴额外的设置逻辑。
¥But, what if we needed to dispatch the same action from many parts of the application? Or what if there's some additional logic that we have to do every time we dispatch an action, like creating a unique ID? We'd end up having to copy-paste the additional setup logic every time we need to dispatch that action.
动作创建者有两个主要目的:
¥Action creators have two primary purposes:
-
他们准备并格式化操作对象的内容
¥They prepare and format the contents of action objects
-
它们封装了我们创建这些操作时所需的任何额外工作
¥They encapsulate any additional work needed whenever we create those actions
这样,无论是否需要完成任何额外的工作,我们都可以采用一致的方法来创建操作。thunk 也是如此。
¥That way, we have a consistent approach for creating actions, whether or not there's any extra work that needs to be done. The same goes for thunks as well.
使用动作创建器
¥Using Action Creators
让我们更新我们的 todos 切片文件,以将操作创建器用于我们的一些操作类型。
¥Let's update our todos slice file to use action creators for a couple of our action types.
我们将从迄今为止使用的两个主要操作开始:从服务器加载待办事项列表,并在将其保存到服务器后添加新的待办事项。
¥We'll start with the two main actions we've been using so far: loading the list of todos from the server, and adding a new todo after saving it to the server.
现在,todosSlice.js 正在直接调度一个动作对象,如下所示:
¥Right now, todosSlice.js is dispatching an action object directly, like this:
dispatch({ type: 'todos/todosLoaded', payload: response.todos })
我们将创建一个函数,该函数创建并返回相同类型的操作对象,但接受待办事项数组作为其参数,并将其作为 action.payload 放入操作中。然后,我们可以使用 fetchTodos thunk 中的新动作创建器来分派该动作:
¥We'll create a function that creates and returns that same kind of action object, but accepts the array of todos as its argument and puts it into the action as action.payload. Then, we can dispatch the action using that new action creator inside of our fetchTodos thunk:
export const todosLoaded = todos => {
  return {
    type: 'todos/todosLoaded',
    payload: todos
  }
}

export async function fetchTodos(dispatch, getState) {
  const response = await client.get('/fakeApi/todos')
  dispatch(todosLoaded(response.todos))
}
我们也可以对 "添加了待办事项" 动作做同样的事情:
¥We can also do the same thing for the "todo added" action:
export const todoAdded = todo => {
  return {
    type: 'todos/todoAdded',
    payload: todo
  }
}

export function saveNewTodo(text) {
  return async function saveNewTodoThunk(dispatch, getState) {
    const initialTodo = { text }
    const response = await client.post('/fakeApi/todos', { todo: initialTodo })
    dispatch(todoAdded(response.todo))
  }
}
当我们这样做时,让我们对 "滤色镜已更改" 动作做同样的事情:
¥While we're at it, let's do the same thing for the "color filter changed" action:
export const colorFilterChanged = (color, changeType) => {
  return {
    type: 'filters/colorFilterChanged',
    payload: { color, changeType }
  }
}
由于此操作是从 <Footer> 组件分派的,因此我们需要在那里导入 colorFilterChanged 操作创建器并使用它:
¥And since this action was being dispatched from the <Footer> component, we'll need to import the colorFilterChanged action creator over there and use it:
import React from 'react'
import { useSelector, useDispatch } from 'react-redux'

import { availableColors, capitalize } from '../filters/colors'
import { StatusFilters, colorFilterChanged } from '../filters/filtersSlice'

// omit child components

const Footer = () => {
  const dispatch = useDispatch()

  const todosRemaining = useSelector(state => {
    const uncompletedTodos = state.todos.filter(todo => !todo.completed)
    return uncompletedTodos.length
  })

  const { status, colors } = useSelector(state => state.filters)

  const onMarkCompletedClicked = () => dispatch({ type: 'todos/allCompleted' })
  const onClearCompletedClicked = () =>
    dispatch({ type: 'todos/completedCleared' })

  const onColorChange = (color, changeType) =>
    dispatch(colorFilterChanged(color, changeType))

  const onStatusChange = status =>
    dispatch({ type: 'filters/statusFilterChanged', payload: status })

  // omit rendering output
}

export default Footer
请注意,colorFilterChanged 操作创建器实际上接受两个不同的参数,然后将它们组合在一起以形成正确的 action.payload 字段。
¥Notice that the colorFilterChanged action creator actually accepts two different arguments, and then combines them together to form the right action.payload field.
这不会改变应用的工作方式或 Redux 数据流的行为方式 - 我们仍在创建操作对象并分派它们。但是,我们并不是一直直接在代码中编写操作对象,而是分派了。
¥This doesn't change anything about how the application works, or how the Redux data flow behaves - we're still creating action objects, and dispatching them. But, instead of writing action objects directly in our code all the time, we're now using action creators to prepare those action objects before they're dispatched.
我们还可以使用带有 thunk 函数的动作创建器,实际上是 我们在上一节中将 thunk 封装在动作创建器中 。 我们专门将 saveNewTodo 封装在 "thunk 动作创建者" 函数中,以便我们可以传入 text 参数。虽然 fetchTodos 不接受任何参数,但我们仍然可以将其封装在动作创建器中:
¥We can also use action creators with thunk functions, and in fact we wrapped a thunk in an action creator in the previous section . We specifically wrapped saveNewTodo in a "thunk action creator" function so that we could pass in a text parameter. While fetchTodos doesn't take any parameters, we could still wrap it in an action creator as well:
export function fetchTodos() {
  return async function fetchTodosThunk(dispatch, getState) {
    const response = await client.get('/fakeApi/todos')
    dispatch(todosLoaded(response.todos))
  }
}
这意味着我们必须更改它在 index.js 中分派的位置以调用外部 thunk 动作创建函数,并将返回的内部 thunk 函数传递给 dispatch:
¥And that means we have to change the place it's dispatched in index.js to call the outer thunk action creator function, and pass the returned inner thunk function to dispatch:
import store from './store'
import { fetchTodos } from './features/todos/todosSlice'

store.dispatch(fetchTodos())
到目前为止,我们已经使用 function 关键字编写了 thunk,以明确它们在做什么。但是,我们也可以使用箭头函数语法来编写它们。使用隐式返回可以缩短代码,但如果你不熟悉箭头函数,它也可能会增加阅读难度:
¥We've written thunks using the function keyword so far to make it clear what they're doing. However, we can also write them using arrow function syntax instead. Using implicit returns can shorten the code, although it may make it a bit harder to read as well if you're not familiar with arrow functions:
// Same thing as the above example!
export const fetchTodos = () => async dispatch => {
  const response = await client.get('/fakeApi/todos')
  dispatch(todosLoaded(response.todos))
}
同样,如果我们想要的话,我们可以缩短普通动作创建者:
¥Similarly, we could shorten the plain action creators if we wanted to:
export const todoAdded = todo => ({ type: 'todos/todoAdded', payload: todo })
由你决定以这种方式使用箭头函数是否更好。
¥It's up to you to decide whether using arrow functions this way is better or not.
有关操作创建者为何有用的更多详细信息,请参阅:
¥For more details on why action creators are useful, see:
记忆选择器
¥Memoized Selectors
我们已经看到,我们可以编写 "selector" 函数,它接受 Redux state 对象作为参数,并返回一个值:
¥We've already seen that we can write "selector" functions, which accept the Redux state object as an argument, and return a value:
const selectTodos = state => state.todos
如果我们需要导出一些数据怎么办?例如,也许我们想要一个仅包含待办事项 ID 的数组:
¥What if we need to derive some data? For example, maybe we want to have an array of only the todo IDs:
const selectTodoIds = state => state.todos.map(todo => todo.id)
但是,array.map() 始终返回新的数组引用。我们知道,React-Redux useSelector hook 在每次分派操作后都会重新运行其选择器函数,如果选择器结果发生变化,它将强制组件重新渲染。
¥However, array.map() always returns a new array reference. We know that the React-Redux useSelector hook will re-run its selector function after every dispatched action, and if the selector result changes, it will force the component to re-render.
在此示例中,调用 useSelector(selectTodoIds) 将始终导致组件在每次操作后重新渲染,因为它返回一个新的数组引用!
¥In this example, calling useSelector(selectTodoIds) will always cause the component to re-render after every action, because it's returning a new array reference!
在第 5 部分中,我们看到了 我们可以将 shallowEqual 作为参数传递给 useSelector。不过,这里还有另一种选择:我们可以使用 "memoized" 选择器。
¥In Part 5, we saw that we can pass shallowEqual as an argument to useSelector. There's another option here, though: we could use "memoized" selectors.
记忆化是一种缓存 - 具体来说,保存昂贵的计算结果,并在以后看到相同的输入时重用这些结果。
¥Memoization is a kind of caching - specifically, saving the results of an expensive calculation, and reusing those results if we see the same inputs later.
记忆选择器函数是保存最新结果值的选择器,如果使用相同的输入多次调用它们,将返回相同的结果值。如果你使用与上次不同的输入调用它们,它们将重新计算新的结果值,缓存它并返回新结果。
¥Memoized selector functions are selectors that save the most recent result value, and if you call them multiple times with the same inputs, will return the same result value. If you call them with different inputs than last time, they will recalculate a new result value, cache it, and return the new result.
使用 createSelector 记忆选择器
¥Memoizing Selectors with createSelector
重新选择库 提供了 createSelector API,可生成记忆选择器函数。createSelector 接受一个或多个 "输入选择器" 函数作为参数,加上 "输出选择器",并返回新的选择器函数。每次调用选择器时:
¥The Reselect library provides a createSelector API that will generate memoized selector functions. createSelector accepts one or more "input selector" functions as arguments, plus an "output selector", and returns the new selector function. Every time you call the selector:
-
使用所有参数调用所有 "输入选择器"
¥All "input selectors" are called with all of the arguments
-
如果任何输入选择器返回值发生更改,"输出选择器" 将重新运行
¥If any of the input selector return values have changed, the "output selector" will re-run
-
所有输入选择器结果都成为输出选择器的参数
¥All of the input selector results become arguments to the output selector
-
输出选择器的最终结果被缓存以供下次使用
¥The final result of the output selector is cached for next time
让我们创建 selectTodoIds 的记忆版本并将其与 <TodoList> 一起使用。
¥Let's create a memoized version of selectTodoIds and use that with our <TodoList>.
首先,我们需要安装 Reselect:
¥First, we need to install Reselect:
npm install reselect
然后,我们可以导入并调用 createSelector。我们原来的 selectTodoIds 函数是在 TodoList.js 中定义的,但更常见的是选择器函数写在相关的切片文件中。那么,让我们将其添加到 todos 切片中:
¥Then, we can import and call createSelector. Our original selectTodoIds function was defined over in TodoList.js, but it's more common for selector functions to be written in the relevant slice file. So, let's add this to the todos slice:
import { createSelector } from 'reselect'

// omit reducer

// omit action creators

export const selectTodoIds = createSelector(
  // First, pass one or more "input selector" functions:
  state => state.todos,
  // Then, an "output selector" that receives all the input results as arguments
  // and returns a final result value
  todos => todos.map(todo => todo.id)
)
那么,我们在 <TodoList> 中使用它:
¥Then, let's use it in <TodoList>:
import React from 'react'
import { useSelector, shallowEqual } from 'react-redux'

import { selectTodoIds } from './todosSlice'
import TodoListItem from './TodoListItem'

const TodoList = () => {
  const todoIds = useSelector(selectTodoIds)

  const renderedListItems = todoIds.map(todoId => {
    return <TodoListItem key={todoId} id={todoId} />
  })

  return <ul className="todo-list">{renderedListItems}</ul>
}
这实际上与 shallowEqual 比较函数的行为有点不同。每当 state.todos 数组发生变化时,我们都会创建一个新的待办事项 ID 数组。这包括对待办事项的任何不可变更新,例如切换其 completed 字段,因为我们必须为不可变更新创建一个新数组。
¥This actually behaves a bit differently than the shallowEqual comparison function does. Any time the state.todos array changes, we're going to create a new todo IDs array as a result. That includes any immutable updates to todo items like toggling their completed field, since we have to create a new array for the immutable update.
仅当你实际从原始数据中派生附加值时,记忆选择器才有用。如果你只是查找并返回现有值,则可以将选择器保留为普通函数。
¥Memoized selectors are only helpful when you actually derive additional values from the original data. If you are only looking up and returning an existing value, you can keep the selector as a plain function.
具有多个参数的选择器
¥Selectors with Multiple Arguments
我们的待办事项应用应该能够根据可见的待办事项的完成状态来过滤它们。让我们编写一个记忆选择器,它返回过滤后的待办事项列表。
¥Our todo app is supposed to have the ability to filter the visible todos based on their completed status. Let's write a memoized selector that returns that filtered list of todos.
我们知道我们需要整个 todos 数组作为输出选择器的一个参数。我们还需要传入当前完成状态过滤器值。我们将添加一个单独的 "输入选择器" 来提取每个值,并将结果传递给 "输出选择器"。
¥We know we need the entire todos array as one argument to our output selector. We also need to pass in the current completion status filter value as well. We'll add a separate "input selector" to extract each value, and pass the results to the "output selector".
import { createSelector } from 'reselect'
import { StatusFilters } from '../filters/filtersSlice'

// omit other code

export const selectFilteredTodos = createSelector(
  // First input selector: all todos
  state => state.todos,
  // Second input selector: current status filter
  state => state.filters.status,
  // Output selector: receives both values
  (todos, status) => {
    if (status === StatusFilters.All) {
      return todos
    }

    const completedStatus = status === StatusFilters.Completed
    // Return either active or completed todos based on filter
    return todos.filter(todo => todo.completed === completedStatus)
  }
)
请注意,我们现在在两个切片之间添加了导入依赖 - todosSlice 正在从 filtersSlice 导入一个值。这是合法的,但要小心。如果两个切片都尝试从彼此导入某些内容,则最终可能会出现 "循环导入依赖" 问题,从而导致代码崩溃。如果发生这种情况,请尝试将一些通用代码移至其自己的文件中,然后从该文件导入。
¥Note that we've now added an import dependency between two slices - the todosSlice is importing a value from the filtersSlice. This is legal, but be careful. If two slices both try to import something from each other, you can end up with a "cyclic import dependency" problem that can cause your code to crash. If that happens, try moving some common code to its own file and import from that file instead.
现在我们可以使用这个新的 "过滤待办事项" 选择器作为另一个选择器的输入,该选择器返回这些待办事项的 ID:
¥Now we can use this new "filtered todos" selector as an input to another selector that returns the IDs of those todos:
export const selectFilteredTodoIds = createSelector(
  // Pass our other memoized selector as an input
  selectFilteredTodos,
  // And derive data in the output selector
  filteredTodos => filteredTodos.map(todo => todo.id)
)
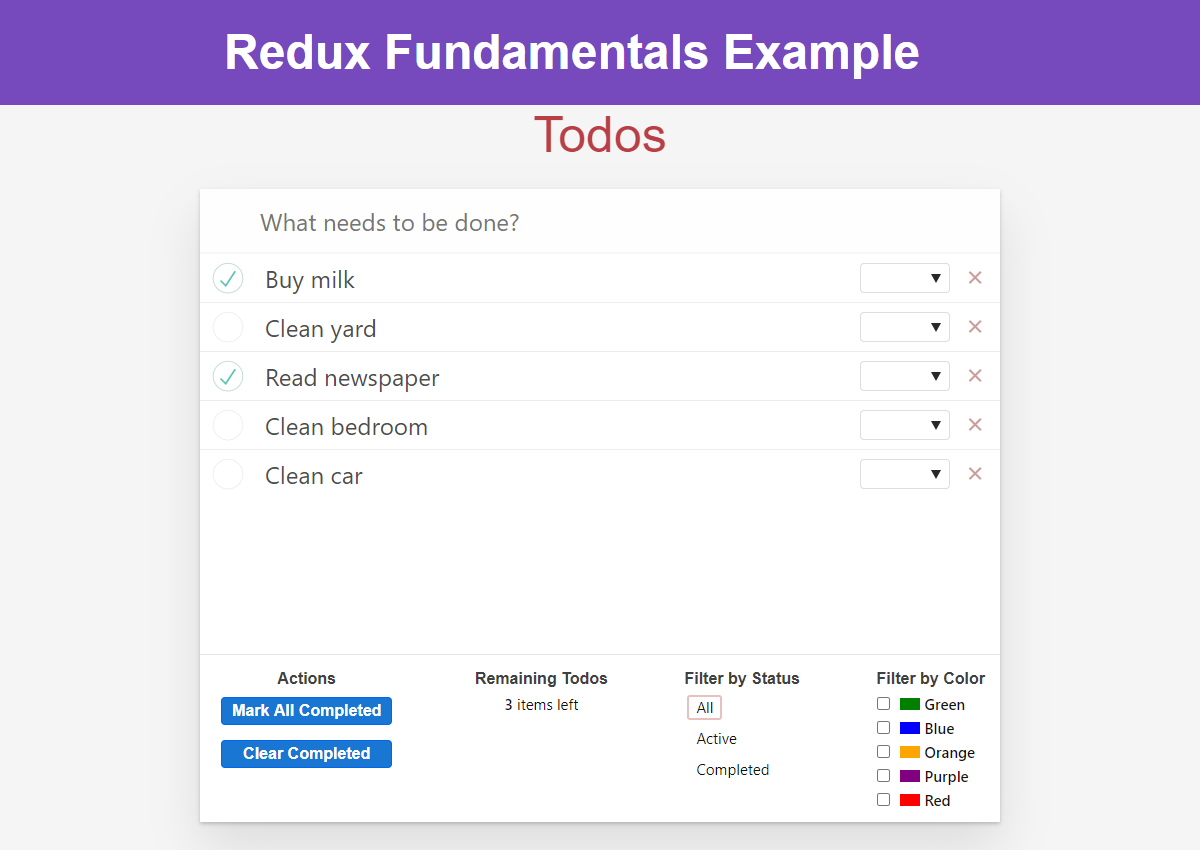
如果我们将 <TodoList> 切换为使用 selectFilteredTodoIds,那么我们应该能够将几个待办事项标记为已完成:
¥If we switch <TodoList> to use selectFilteredTodoIds, we should then be able to mark a couple todo items as completed:
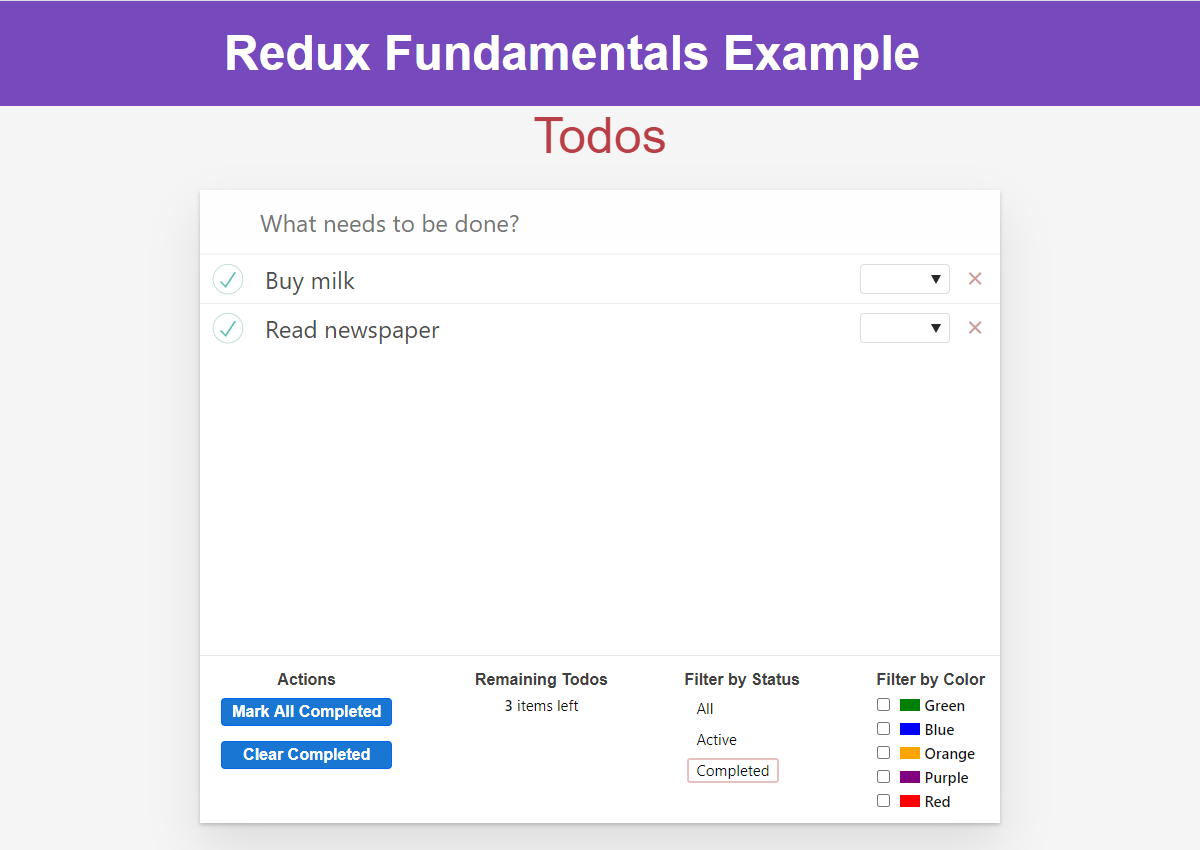
然后过滤列表以仅显示已完成的待办事项:
¥and then filter the list to only show completed todos:
然后我们可以扩展 selectFilteredTodos 以在选择中也包含颜色过滤:
¥We can then expand our selectFilteredTodos to also include color filtering in the selection as well:
export const selectFilteredTodos = createSelector(
  // First input selector: all todos
  selectTodos,
  // Second input selector: all filter values
  state => state.filters,
  // Output selector: receives both values
  (todos, filters) => {
    const { status, colors } = filters
    const showAllCompletions = status === StatusFilters.All
    if (showAllCompletions && colors.length === 0) {
      return todos
    }

    const completedStatus = status === StatusFilters.Completed
    // Return either active or completed todos based on filter
    return todos.filter(todo => {
      const statusMatches =
        showAllCompletions || todo.completed === completedStatus
      const colorMatches = colors.length === 0 || colors.includes(todo.color)
      return statusMatches && colorMatches
    })
  }
)
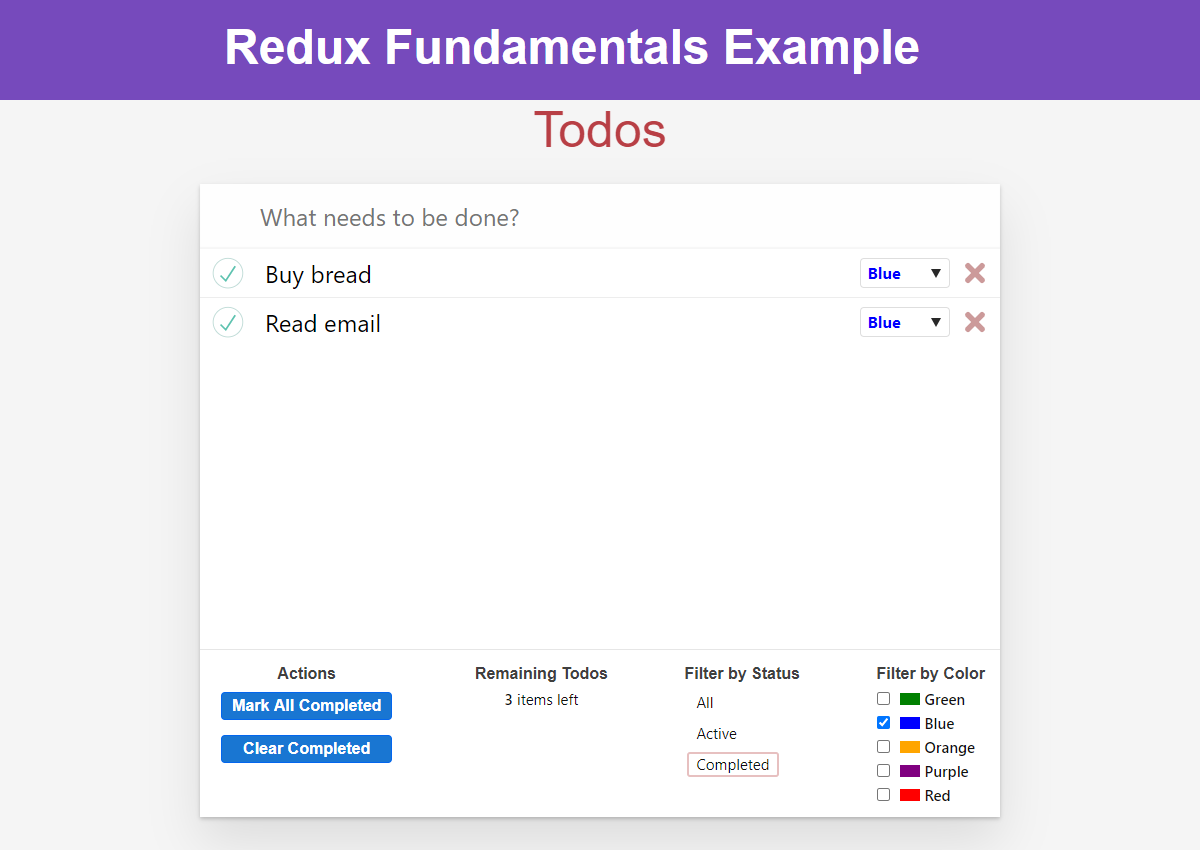
请注意,通过将逻辑封装在此选择器中,即使我们更改了过滤行为,我们的组件也永远不需要更改。现在我们可以同时按状态和颜色进行过滤:
¥Notice that by encapsulating the logic in this selector, our component never needed to change, even as we changed the filtering behavior. Now we can filter by both status and color at once:
最后,我们的代码在几个地方查找 state.todos。当我们完成本节的其余部分时,我们将对该状态的设计方式进行一些更改,因此我们将提取一个 selectTodos 选择器并在任何地方使用它。我们还可以将 selectTodoById 移到 todosSlice 中:
¥Finally, we've got several places where our code is looking up state.todos. We're going to be making some changes to how that state is designed as we go through the rest of this section, so we'll extract a single selectTodos selector and use that everywhere. We can also move selectTodoById over into the todosSlice:
export const selectTodos = state => state.todos

export const selectTodoById = (state, todoId) => {
  return selectTodos(state).find(todo => todo.id === todoId)
}
有关我们为什么使用选择器函数以及如何使用 Reselect 编写记忆选择器的更多详细信息,请参阅:
¥For more details on why we use selector functions and how to write memoized selectors with Reselect, see:
异步请求状态
¥Async Request Status
我们使用异步 thunk 从服务器获取初始的待办事项列表。由于我们使用的是假服务器 API,该响应会立即返回。在真实的应用中,API 调用可能需要一段时间才能解析。在这种情况下,当我们等待响应完成时,通常会显示某种加载旋转器。
¥We're using an async thunk to fetch the initial list of todos from the server. Since we're using a fake server API, that response comes back immediately. In a real app, the API call might take a while to resolve. In that case, it's common to show some kind of a loading spinner while we wait for the response to complete.
这通常在 Redux 应用中通过以下方式处理:
¥This is usually handled in Redux apps by:
-
有某种 "加载状态" 值来指示请求的当前状态
¥Having some kind of "loading state" value to indicate the current status of a request
-
在进行 API 调用之前调度 "请求已开始" 操作,这是通过更改加载状态值来处理的
¥Dispatching a "request started" action before making the API call, which is handled by changing the loading state value
-
当请求完成时再次更新加载状态值以指示调用已完成
¥Updating the loading state value again when the request completes to indicate that the call is done
然后,UI 层会在请求进行过程中显示加载加载控件,并在请求完成时切换到显示实际数据。
¥The UI layer then shows a loading spinner while the request is in progress, and switches to showing the actual data when the request is complete.
我们将更新我们的 todos 切片以跟踪加载状态值,并分派额外的 'todos/todosLoading' 操作作为 fetchTodos thunk 的一部分。
¥We're going to update our todos slice to track a loading state value, and dispatch an additional 'todos/todosLoading' action as part of the fetchTodos thunk.
现在,我们的 todos reducer 的 state 只是 todos 数组本身。如果我们想要跟踪 todos 切片内的加载状态,我们需要将 todos 状态重新组织为具有 todos 数组和加载状态值的对象。这也意味着重写 reducer 逻辑来处理额外的嵌套:
¥Right now, the state of our todos reducer is only the array of todos itself. If we want to track the loading state inside the todos slice, we'll need to reorganize the todos state to be an object that has the todos array and the loading state value. That also means rewriting the reducer logic to handle the additional nesting:
const initialState = {
  status: 'idle',
  entities: []
}

export default function todosReducer(state = initialState, action) {
  switch (action.type) {
    case 'todos/todoAdded': {
      return {
        ...state,
        entities: [...state.entities, action.payload]
      }
    }
    case 'todos/todoToggled': {
      return {
        ...state,
        entities: state.entities.map(todo => {
          if (todo.id !== action.payload) {
            return todo
          }

          return {
            ...todo,
            completed: !todo.completed
          }
        })
      }
    }
    // omit other cases
    default:
      return state
  }
}

// omit action creators

export const selectTodos = state => state.todos.entities
这里有一些重要的事情需要注意:
¥There's a few important things to note here:
-
todos 数组现在作为
state.entities嵌套在todosReducer状态对象中。"entities" 这个词意味着 "具有 ID 的唯一项目",它确实描述了我们的待办事项对象。¥The todos array is now nested as
state.entitiesin thetodosReducerstate object. The word "entities" is a term that means "unique items with an ID", which does describe our todo objects. -
这也意味着该数组作为
state.todos.entities嵌套在整个 Redux 状态对象中¥That also means the array is nested in the entire Redux state object as
state.todos.entities -
我们现在必须在 reducer 中执行额外的步骤来复制额外的嵌套级别以实现正确的不可变更新,例如
state对象 ->entities数组 ->todo对象¥We now have to do extra steps in the reducer to copy the additional level of nesting for correct immutable updates, such as
stateobject ->entitiesarray ->todoobject -
因为我们的其余代码仅通过选择器访问 todos 状态,所以我们只需要更新
selectTodos选择器 - 即使我们大幅调整了状态,UI 的其余部分仍将继续按预期工作。¥Because the rest of our code is only accessing the todos state via selectors, we only need to update the
selectTodosselector - the rest of the UI will continue to work as expected even though we reshaped our state considerably.
加载状态枚举值
¥Loading State Enum Values
你还会注意到,我们已将加载状态字段定义为字符串枚举:
¥You'll also notice that we've defined the loading state field as a string enum:
{
  status: 'idle' // or: 'loading', 'succeeded', 'failed'
}
而不是 isLoading 布尔值。
¥instead of an isLoading boolean.
布尔值将我们限制为两种可能性:"loading" 或 "未加载"。实际上,请求实际上可能处于许多不同的状态,例如:
¥A boolean limits us to two possibilities: "loading" or "not loading". In reality, it's possible for a request to actually be in many different states, such as:
-
根本还没有开始
¥Hasn't started at all
-
进行中
¥In progress
-
成功了
¥Succeeded
-
失败的
¥Failed
-
成功了,但现在又回到了我们可能想要重新获取的情况
¥Succeeded, but now back in a situation where we might want to refetch
应用逻辑也可能只应根据某些操作在特定状态之间转换,而使用布尔值很难实现这一点。
¥It's also possible that the app logic should only transition between specific states based on certain actions, and this is harder to implement using booleans.
因此,我们建议将加载状态存储为字符串枚举值而不是布尔标志。
¥Because of this, we recommend storing loading state as a string enum value instead of boolean flags.
有关为什么加载状态应该是枚举的详细说明,请参阅:
¥For a detailed explanation of why loading states should be enums, see:
在此基础上,我们将添加一个新的 "loading" 操作,将状态设置为 'loading',并更新 "loaded" 操作以将状态标志重置为 'idle':
¥Based on that, we'll add a new "loading" action that will set our status to 'loading', and update the "loaded" action to reset the state flag to 'idle':
const initialState = {
  status: 'idle',
  entities: []
}

export default function todosReducer(state = initialState, action) {
  switch (action.type) {
    // omit other cases
    case 'todos/todosLoading': {
      return {
        ...state,
        status: 'loading'
      }
    }
    case 'todos/todosLoaded': {
      return {
        ...state,
        status: 'idle',
        entities: action.payload
      }
    }
    default:
      return state
  }
}

// omit action creators

// Thunk function
export const fetchTodos = () => async dispatch => {
  dispatch(todosLoading())
  const response = await client.get('/fakeApi/todos')
  dispatch(todosLoaded(response.todos))
}
然而,在尝试在 UI 中显示这一点之前,我们需要修改假服务器 API,为 API 调用添加人为延迟。打开 src/api/server.js,并在第 63 行周围查找注释掉的行:
¥However, before we try to show this in the UI, we need to modify the fake server API to add an artificial delay to our API calls. Open up src/api/server.js, and look for this commented-out line around line 63:
new Server({
  routes() {
    this.namespace = 'fakeApi'
    // this.timing = 2000

    // omit other code
  }
})
如果你取消注释该行,假服务器将为我们的应用进行的每个 API 调用添加 2 秒的延迟,这使我们有足够的时间来实际看到正在显示的加载旋转器。
¥If you uncomment that line, the fake server will add a 2-second delay to every API call our app makes, which gives us enough time to actually see a loading spinner being displayed.
现在,我们可以读取 <TodoList> 组件中的加载状态值,并根据该值显示加载旋转器。
¥Now, we can read the loading state value in our <TodoList> component, and show a loading spinner instead based on that value.
// omit imports

const TodoList = () => {
  const todoIds = useSelector(selectFilteredTodoIds)
  const loadingStatus = useSelector(state => state.todos.status)

  if (loadingStatus === 'loading') {
    return (
      <div className="todo-list">
        <div className="loader" />
      </div>
    )
  }

  const renderedListItems = todoIds.map(todoId => {
    return <TodoListItem key={todoId} id={todoId} />
  })

  return <ul className="todo-list">{renderedListItems}</ul>
}
在真实的应用中,我们还希望处理 API 失败错误和其他潜在情况。
¥In a real app, we'd also want to handle API failure errors and other potential cases.
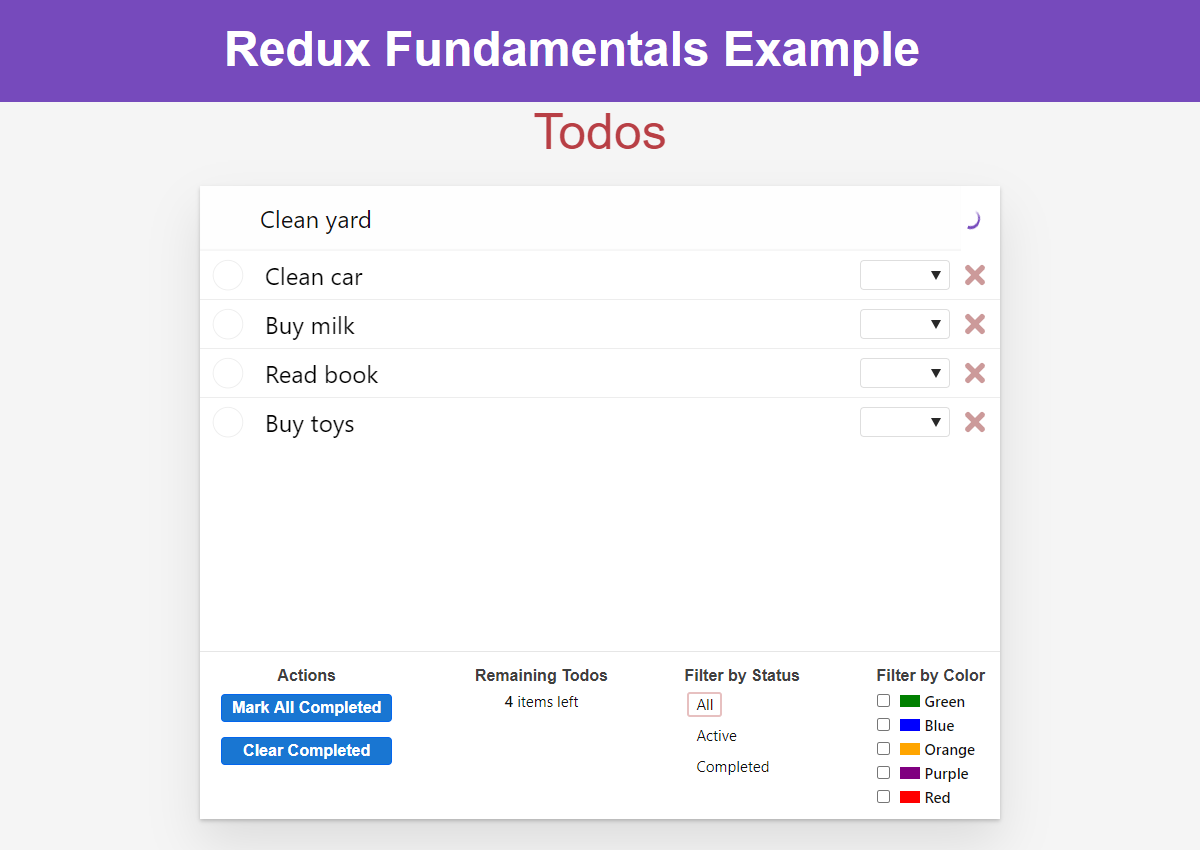
以下是启用加载状态后应用的外观(要再次查看加载控件,请重新加载应用预览或在新选项卡中打开它):
¥Here's what the app looks like with that loading status enabled (to see the spinner again, reload the app preview or open it in a new tab):
通量标准动作
¥Flux Standard Actions
Redux 存储本身实际上并不关心你将哪些字段放入操作对象中。它只关心 action.type 是否存在并且是一个字符串。这意味着你可以将任何其他字段放入你想要的操作中。也许我们可以用 action.todo 来执行 "添加了待办事项" 操作,或者 action.color,等等。
¥The Redux store itself does not actually care what fields you put into your action object. It only cares that action.type exists and is a string. That means that you could put any other fields into the action that you want. Maybe we could have action.todo for a "todo added" action, or action.color, and so on.
但是,如果每个操作对其数据字段使用不同的字段名称,则可能很难提前知道每个 reducer 需要处理哪些字段。
¥However, if every action uses different field names for its data fields, it can be hard to know ahead of time what fields you need to handle in each reducer.
这就是 Redux 社区提出 "通量标准动作" 公约 或 "FSA" 的原因。这是关于如何组织操作对象内部字段的建议方法,以便开发者始终知道哪些字段包含哪种数据。FSA 模式在 Redux 社区中广泛使用,事实上你已经在整个教程中使用了它。
¥That's why the Redux community came up with the "Flux Standard Actions" convention, or "FSA". This is a suggested approach for how to organize fields inside of action objects, so that developers always know what fields contain what kind of data. The FSA pattern is widely used in the Redux community, and in fact you've already been using it throughout this whole tutorial.
FSA 公约规定:
¥The FSA convention says that:
-
如果你的操作对象有任何实际数据,则操作的 "data" 值应始终位于
action.payload中¥If your action object has any actual data, that "data" value of your action should always go in
action.payload -
操作还可能有一个带有额外描述性数据的
action.meta字段¥An action may also have an
action.metafield with extra descriptive data -
操作可能有包含错误信息的
action.error字段¥An action may have an
action.errorfield with error information
因此,所有 Redux 操作都必须:
¥So, all Redux actions MUST:
-
是一个普通的 JavaScript 对象
¥be a plain JavaScript object
-
有
type字段¥have a
typefield
如果你使用 FSA 模式编写操作,则操作可以
¥And if you write your actions using the FSA pattern, an action MAY
-
有
payload字段¥have a
payloadfield -
有一个
error字段¥have an
errorfield -
有
meta字段¥have a
metafield
Detailed Explanation: FSAs and Errors
FSA 规范指出:
¥The FSA specification says that:
如果操作表示错误,则可选的
error属性可以设置为true。error为 true 的操作类似于被拒绝的 Promise。按照约定,payload应该是一个错误对象。如果error除了true之外还有任何其他值,包括undefined和null,则该操作不得被解释为错误。¥The optional
errorproperty MAY be set totrueif the action represents an error. An action whoseerroris true is analogous to a rejected Promise. By convention, thepayloadSHOULD be an error object. Iferrorhas any other value besidestrue, includingundefinedandnull, the action MUST NOT be interpreted as an error.
FSA 规范还反对为 "加载成功" 和 "加载失败" 等设置特定的操作类型。
¥The FSA specs also argue against having specific action types for things like "loading succeeded" and "loading failed".
然而,在实践中,Redux 社区忽略了使用 action.error 作为布尔标志的想法,而是选择了单独的操作类型,例如 'todos/todosLoadingSucceeded' 和 'todos/todosLoadingFailed'。这是因为检查这些操作类型比先处理 'todos/todosLoaded' 然后检查 if (action.error) 容易得多。
¥However, in practice, the Redux community has ignored the idea of using action.error as a boolean flag, and instead settled on separate action types, like 'todos/todosLoadingSucceeded' and 'todos/todosLoadingFailed'. This is because it's much easier to check for those action types than it is to first handle 'todos/todosLoaded' and then check if (action.error).
你可以采用更适合你的方法,但大多数应用使用单独的操作类型来判断成功和失败。
¥You can do whichever approach works better for you, but most apps use separate action types for success and failure.
标准化状态
¥Normalized State
到目前为止,我们已经将待办事项保存在一个数组中。这是合理的,因为我们从服务器以数组形式接收数据,并且我们还需要循环待办事项以将它们显示为 UI 中的列表。
¥So far, we've kept our todos in an array. This is reasonable, because we received the data from the server as an array, and we also need to loop over the todos to show them as a list in the UI.
然而,在较大的 Redux 应用中,通常将数据存储在规范化的状态结构中。"正常化" 的意思是:
¥However, in larger Redux apps, it is common to store data in a normalized state structure. "Normalization" means:
-
确保每条数据只有一份副本
¥Making sure there is only one copy of each piece of data
-
以允许直接通过 ID 查找项目的方式存储项目
¥Storing items in a way that allows directly finding items by ID
-
根据 ID 引用其他项目,而不是复制整个项目
¥Referring to other items based on IDs, instead of copying the entire item
例如,在博客应用中,你可能有 Post 对象指向 User 和 Comment 对象。同一个人可能有很多帖子,因此如果每个 Post 对象都包含整个 User,那么我们将拥有同一 User 对象的许多副本。相反,Post 对象的用户 ID 值为 post.user,然后我们可以通过 ID state.users[post.user] 查找 User 对象。
¥For example, in a blogging application, you might have Post objects that point to User and Comment objects. There might be many posts by the same person, so if every Post object includes an entire User, we would have many copies of the same User object. Instead, a Post object would have a user ID value as post.user, and then we could look up User objects by ID as state.users[post.user].
这意味着我们通常将数据组织为对象而不是数组,其中项目 ID 是键,项目本身是值,如下所示:
¥This means we typically organize our data as objects instead of arrays, where the item IDs are the keys and the items themselves are the values, like this:
const rootState = {
  todos: {
    status: 'idle',
    entities: {
      2: { id: 2, text: 'Buy milk', completed: false },
      7: { id: 7, text: 'Clean room', completed: true }
    }
  }
}
让我们转换待办事项切片,以标准化形式存储待办事项。这将需要对我们的 reducer 逻辑进行一些重大更改,并更新选择器:
¥Let's convert our todos slice to store the todos in a normalized form. This will require some significant changes to our reducer logic, as well as updating the selectors:
const initialState = {
  status: 'idle',
  entities: {}
}

export default function todosReducer(state = initialState, action) {
  switch (action.type) {
    case 'todos/todoAdded': {
      const todo = action.payload
      return {
        ...state,
        entities: {
          ...state.entities,
          [todo.id]: todo
        }
      }
    }
    case 'todos/todoToggled': {
      const todoId = action.payload
      const todo = state.entities[todoId]
      return {
        ...state,
        entities: {
          ...state.entities,
          [todoId]: {
            ...todo,
            completed: !todo.completed
          }
        }
      }
    }
    case 'todos/colorSelected': {
      const { color, todoId } = action.payload
      const todo = state.entities[todoId]
      return {
        ...state,
        entities: {
          ...state.entities,
          [todoId]: {
            ...todo,
            color
          }
        }
      }
    }
    case 'todos/todoDeleted': {
      const newEntities = { ...state.entities }
      delete newEntities[action.payload]
      return {
        ...state,
        entities: newEntities
      }
    }
    case 'todos/allCompleted': {
      const newEntities = { ...state.entities }
      Object.values(newEntities).forEach(todo => {
        newEntities[todo.id] = {
          ...todo,
          completed: true
        }
      })
      return {
        ...state,
        entities: newEntities
      }
    }
    case 'todos/completedCleared': {
      const newEntities = { ...state.entities }
      Object.values(newEntities).forEach(todo => {
        if (todo.completed) {
          delete newEntities[todo.id]
        }
      })
      return {
        ...state,
        entities: newEntities
      }
    }
    case 'todos/todosLoading': {
      return {
        ...state,
        status: 'loading'
      }
    }
    case 'todos/todosLoaded': {
      const newEntities = {}
      action.payload.forEach(todo => {
        newEntities[todo.id] = todo
      })
      return {
        ...state,
        status: 'idle',
        entities: newEntities
      }
    }
    default:
      return state
  }
}

// omit action creators

const selectTodoEntities = state => state.todos.entities

export const selectTodos = createSelector(selectTodoEntities, entities =>
  Object.values(entities)
)

export const selectTodoById = (state, todoId) => {
  return selectTodoEntities(state)[todoId]
}
因为我们的 state.entities 字段现在是一个对象而不是数组,所以我们必须使用嵌套对象扩展运算符来更新数据而不是数组操作。另外,我们不能像循环数组一样循环对象,所以有几个地方我们必须使用 Object.values(entities) 来获取待办事项的数组,以便我们可以循环它们。
¥Because our state.entities field is now an object instead of an array, we have to use nested object spread operators to update the data instead of array operations. Also, we can't loop over objects the way we loop over arrays, so there's several places where we have to use Object.values(entities) to get an array of the todo items so that we can loop over them.
好消息是,因为我们使用选择器来封装状态查找,所以我们的 UI 仍然不需要更改。坏消息是,reducer 代码实际上更长、更复杂。
¥The good news is that because we're using selectors to encapsulate the state lookups, our UI still doesn't have to change. The bad news is that the reducer code is actually longer and more complicated.
这里的部分问题是这个待办事项应用示例不是一个大型的现实应用。因此,规范化状态在这个特定的应用中并不那么有用,而且更难看到潜在的好处。
¥Part of the issue here is that this todo app example is not a large real-world application. So, normalizing state is not as useful in this particular app, and it's harder to see the potential benefits.
幸运的是,在 第 8 部分:使用 Redux 工具包的现代 Redux 中,我们将看到一些方法来大大缩短管理规范化状态的 reducer 逻辑。
¥Fortunately, in Part 8: Modern Redux with Redux Toolkit we'll see some ways to drastically shorten the reducer logic for managing our normalized state.
目前,需要了解的重要事项是:
¥For now, the important things to understand are:
-
标准化常用于 Redux 应用中
¥Normalization is commonly used in Redux apps
-
主要好处是能够通过 ID 查找单个项目并确保该状态中仅存在该项目的一个副本
¥The primary benefits are being able to look up individual items by ID and ensure that only one copy of an item exists in the state
有关标准化为何对 Redux 有用的更多详细信息,请参阅:
¥For more details on why normalization is useful with Redux, see:
块与 Promise
¥Thunks and Promises
本节我们还有最后一个模式需要关注。我们已经了解了如何根据分派的操作处理 Redux 存储中的加载状态。如果我们需要查看组件中 thunk 的结果怎么办?
¥We have one last pattern to look at for this section. We've already seen how to handle loading state in the Redux store based on dispatched actions. What if we need to look at the results of a thunk in our components?
每当你调用 store.dispatch(action) 时,dispatch 实际上都会返回 action 作为其结果。然后,中间件可以修改该行为并返回一些其他值。
¥Whenever you call store.dispatch(action), dispatch will actually return the action as its result. Middleware can then modify that behavior and return some other value instead.
我们已经看到 Redux Thunk 中间件让我们将一个函数传递给 dispatch,调用该函数,然后返回结果:
¥We've already seen that the Redux Thunk middleware lets us pass a function to dispatch, calls the function, and then returns the result:
const reduxThunkMiddleware = storeAPI => next => action => {
  // If the "action" is actually a function instead...
  if (typeof action === 'function') {
    // then call the function and pass `dispatch` and `getState` as arguments
    // Also, return whatever the thunk function returns
    return action(storeAPI.dispatch, storeAPI.getState)
  }

  // Otherwise, it's a normal action - send it onwards
  return next(action)
}
这意味着我们可以编写返回 Promise 的 thunk 函数,并在组件中等待该 Promise。
¥This means that we can write thunk functions that return a promise, and wait on that promise in our components.
我们已经让 <Header> 组件调度一个 thunk 将新的待办事项条目保存到服务器。让我们在 <Header> 组件中添加一些加载状态,然后禁用文本输入并在等待服务器时显示另一个加载加载控件:
¥We already have our <Header> component dispatching a thunk to save new todo entries to the server. Let's add some loading state inside the <Header> component, then disable the text input and show another loading spinner while we're waiting for the server:
const Header = () => {
  const [text, setText] = useState('')
  const [status, setStatus] = useState('idle')
  const dispatch = useDispatch()

  const handleChange = e => setText(e.target.value)

  const handleKeyDown = async e => {
    // If the user pressed the Enter key:
    const trimmedText = text.trim()
    if (e.which === 13 && trimmedText) {
      // Create and dispatch the thunk function itself
      setStatus('loading')
      // Wait for the promise returned by saveNewTodo
      await dispatch(saveNewTodo(trimmedText))
      // And clear out the text input
      setText('')
      setStatus('idle')
    }
  }

  let isLoading = status === 'loading'
  let placeholder = isLoading ? '' : 'What needs to be done?'
  let loader = isLoading ? <div className="loader" /> : null

  return (
    <header className="header">
      <input
        className="new-todo"
        placeholder={placeholder}
        autoFocus={true}
        value={text}
        onChange={handleChange}
        onKeyDown={handleKeyDown}
        disabled={isLoading}
      />
      {loader}
    </header>
  )
}

export default Header
现在,如果我们添加待办事项,我们将在标题中看到一个加载控件:
¥Now, if we add a todo, we'll see a spinner in the header:
你学到了什么
¥What You've Learned
正如你所看到的,Redux 应用中广泛使用了几种其他模式。这些模式不是必需的,并且最初可能需要编写更多代码,但它们提供了一些好处,例如使逻辑可重用、封装实现细节、提高应用性能以及使查找数据变得更容易。
¥As you've seen, there's several additional patterns that are widely used in Redux apps. These patterns are not required, and may involve writing more code initially, but they provide benefits like making logic reusable, encapsulating implementation details, improving app performance, and making it easier to look up data.
有关这些模式存在的原因以及 Redux 的使用方式的更多详细信息,请参阅:
¥For more details on why these patterns exist and how Redux is meant to be used, see:
以下是我们的应用完全转换为使用这些模式后的外观:
¥Here's how our app looks after it's been fully converted to use these patterns:
-
动作创建器函数封装了准备动作对象和 thunk
¥Action creator functions encapsulate preparing action objects and thunks
-
动作创建者可以接受参数并包含设置逻辑,并返回最终的动作对象或 thunk 函数
¥Action creators can accept arguments and contain setup logic, and return the final action object or thunk function
-
-
记忆选择器有助于提高 Redux 应用性能
¥Memoized selectors help improve Redux app performance
-
Reselect 有一个
createSelectorAPI,可以生成记忆选择器¥Reselect has a
createSelectorAPI that generates memoized selectors -
如果给定相同的输入,记忆选择器将返回相同的结果引用
¥Memoized selectors return the same result reference if given the same inputs
-
-
请求状态应存储为枚举,而不是布尔值
¥Request status should be stored as an enum, not booleans
-
使用
'idle'和'loading'等枚举有助于一致地跟踪状态¥Using enums like
'idle'and'loading'helps track status consistently
-
-
"通量标准动作" 是组织动作对象的通用约定
¥"Flux Standard Actions" are the common convention for organizing action objects
-
操作使用
payload表示数据,使用meta表示额外描述,使用error表示错误¥Actions use
payloadfor data,metafor extra descriptions, anderrorfor errors
-
-
规范化状态可以更轻松地通过 ID 查找项目
¥Normalized state makes it easier to find items by ID
-
规范化数据存储在对象而不是数组中,以项目 ID 作为键
¥Normalized data is stored in objects instead of arrays, with item IDs as keys
-
-
Thunks 可以返回
dispatch的 promise¥Thunks can return promises from
dispatch-
组件可以等待异步 thunk 完成,然后执行更多工作
¥Components can wait for async thunks to complete, then do more work
-
下一步是什么?
¥What's Next?
编写所有这些代码 "用手" 可能既耗时又困难。这就是为什么我们建议你使用我们的官方 Redux 工具包 包来编写 Redux 逻辑。
¥Writing all this code "by hand" can be time-consuming and difficult. That's why we recommend that you use our official Redux Toolkit package to write your Redux logic instead.
Redux Toolkit 包含的 API 可以帮助你编写所有典型的 Redux 使用模式,但代码量更少。它还有助于防止常见错误,例如意外改变状态。
¥Redux Toolkit includes APIs that help you write all the typical Redux usage patterns, but with less code. It also helps prevent common mistakes like accidentally mutating state.
在 第 8 部分:现代回归 中,我们将介绍如何使用 Redux Toolkit 来简化我们迄今为止编写的所有代码。
¥In Part 8: Modern Redux, we'll cover how to use Redux Toolkit to simplify all the code we've written so far.